Configuring a Jira project in Siren Investigate
The Jira plugin for Siren Investigate can be configured by updating several project-related parameters. To update the parameters, go to Management → Advanced Settings.
Setting the file export size
To set the maximum number of rows of dashboard data that are exported as a CSV file attachment, update the jira:csvExportSize parameter.
By default, the value is 3000 rows, and this value can be increased or decreased as required.
|
The higher the number of rows that you specify, the more the time it takes to export and attach the file to a ticket. |
Setting the available fields
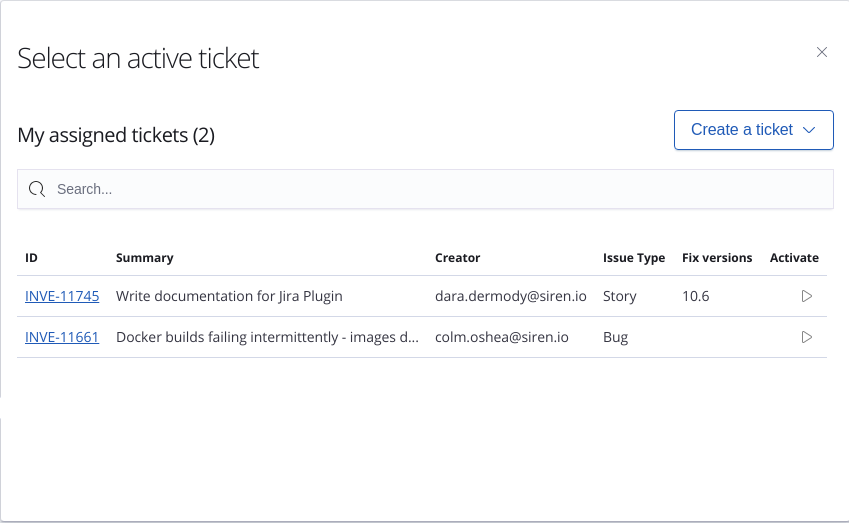
You can configure which fields are available in the plugin pop-up window by updating the jira:fields parameter.
By default, the available columns are ID, Summary and Activate.
The ID and Activate columns are always displayed and cannot be removed. The default value of jira:fields is Summary but the column can be removed if required.
Because Jira offers multiple types of fields and supports custom fields, you might need to find the new field name to add to the list of columns.
For example, to find the fields Reporter and Updated, complete the following steps:
Step 1: Finding the name of a field
Go to https://<your-jira-host>:<port>/rest/api/latest/field to find the details of each field. The following output is displayed:
[
  {
    "id": "reporter",
    "key": "reporter",
    "name": "Reporter",
    ...
  },
  {
    "id": "updated",
    "key": "updated",
    "name": "Updated",
    ...
  }
  ...
]
The above code indicates that the IDs of the two fields that we are looking for are reporter and updated (all in lowercase).
Step 2: Using the ID to see the field structure
You can use one of the tickets that you see in the plugin to complete the following step.
-
Check the ID of one your tickets, for example ABC-123. In a browser window, go to
https://<your-jira-host>:<port>/rest/api/latest/issue/ABC-123. -
Format the output and, in the
fieldsobject, a list is displayed of field IDs that are associated with that project, along with the structure of each field. For example, the fields object might be displayed as follows:
  "fields": {
    "updated": "2020-04-09T14:09:38.858+0100",
    "reporter": {
      "emailAddress": "cillian.murphy@example.com",
      "displayName": "Cillian Murphy",
      "active": true,
      "timeZone": "Europe/Ireland",
      "accountType": "atlassian"
    },
    ...
  }
The code informs us that fields object can have either plain objects, such as updated or nested objects, such as reporter.
For nested objects
Write the path to the value using the format <fieldName>.<nestedAttribute> in the jira:fields setting.
For example, if you wish to show the emailAddress of the reporter, specify Reporter.emailAddress in the jira:fields setting. Reporter is the name of the field and the .emailAddress is an attribute that is nested directly under reporter.
|
Each field in the in |
The following screenshots show an example of the configuration and the output for jira:fields.

