White-labelling in Siren
White-labelling is the process of changing some elements in a product to reflect the branding of a company or organization deploying that product. You can label certain constants and modify images and icons in Siren Investigate to reflect the branding of your company or organization.
Changing company and product names
The company and product names default to ‘Siren’ and ‘Investigate’, respectively. To change them, on the server, go to Siren Investigate > config and edit the investigate.yml file. Search for the term whiteLabel and you should find the company and product name keys as shown below.
#The white labels.
whiteLabel:
  companyName: Siren
  productName: Investigate
If the keys are not in investigate.yml, you can add them, ensuring they are formatted exactly as shown.
|
Change the names as required and once done, restart the server and refresh Investigate to view the changes.
Hiding the copyright
The copyright text is normally visible on the user interface under Management. If you want to suppress the display of this text, go to Siren Investigate > config and in the investigate.yml file change the value of the whiteLabel.hideCopyright key to true. If the key is not there, add it as shown below.
#The white labels.
whiteLabel:
  companyName: Siren
  productName: Investigate
  hideCopyright: false
Adding management information
If you wish to add more information on the user interface under Management, it can be done by adding keys under whiteLabel.management.info. For example, doing
#The white labels
whiteLabel:
  companyName: Siren
  productName: Investigate
  hideCopyright: false
  management:
    info:
      App Version: 1.4.5
would add the "App Version" on the Management page as shown below
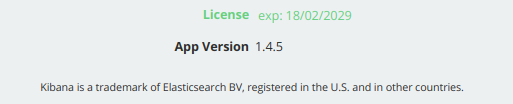
Multiple keys can also be added under whiteLabel.management.info.
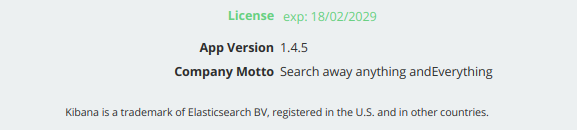
The key(s) can also be added by passing the additional information as an environment variable to Investigate’s docker image. To do it, prepend the actual key you wish to pass with the string "WHITELABEL_MANAGEMENT_INFO_". For example, to add the "App Version" and the "Company Motto", a parameter will be passed to the docker run command as follows
docker run -e WHITELABEL_MANAGEMENT_INFO_App_Version=1.4.5 -e WHITELABEL_MANAGEMENT_INFO_Company_Motto=Search_away_anything_andEverything <imageId>| In order to add space(s) between the strings of the keys or the values, add a "underscore" between them. The underscores are post processed to be replaced by space before showing up on the user interface. Everything else (including the case of the keys and values) remain the same. For example, running the above docker command will show the key and value on the user interface as follows |
Changing images and favicons
Custom images and favicons can be configured through imagesDir and faviconsDir respectively.
#The white labels.
whiteLabel:
  companyName: Siren
  productName: Investigate
  hideCopyright: false
  management:
    info:
      App Version: 1.4.5
  faviconsDir: /path/to/your/favicons/folder
  imagesDir: /path/to/your/images/folder
To change the images and/or favicons, perform the following steps.
-
Update
imagesDirand/orfaviconsDirconfigurations with a non-empty and accessible directory -
Delete the Siren Investigate > optimize folder
-
Restart the server
The logo images that can be customized are as follows:
| Logo Name | Dimensions |
|---|---|
logo.png |
1026x1021 |
full_logo.png |
348x102 |
loading_logo.gif |
66x65 |
Favicons folder is expected to have the standard set of favicons files as follows:
| Filename |
|---|
android-chrome-192x192.png |
android-chrome-256x256.png |
android-chrome-512x512.png |
apple-touch-icon.png |
browserconfig.xml |
favicon-16x16.png |
favicon-32x32.png |
favicon.ico |
manifest.json |
mstile-150x150.png |
safari-pinned-tab.svg |
| Ensure that the new image has exactly the same name as the image you are replacing it with. For example, if you change the loading graphic (normally an animated GIF file), ensure that the name of the new GIF file is loading_logo.gif. |
Adding custom icons
To customize the appearance of your data models, you can import custom icons into Siren Investigate. You generate the custom webfont icons from SVGs (Scalable Vector Graphics) using the FontCustom utility.
To generate the webfonts, you download a pre-configured Docker image that comes with an environment setup to use the FontCustom library. When you run the Docker image, you mount a local directory from your computer to the container running the image. The FontCustom command generates the icons inside the Docker container, but since you mount a local directory, the icons are generated in the directory on your local computer.
| This feature requires that you are familiar with Docker and command line tools. You must also have Docker installed locally. |
Downloading and running the Docker image
-
Download Siren’s pre-configured FontCustom Docker image.
docker pull sirensolutions/siren-fontcustom -
On your local computer, create a folder that only contains your SVGs. This example uses
/tmp/iconswhereiconsis the folder that contains the SVGs. -
Run the Docker image:
-
Mac OS or Linux
docker run -div /tmp/icon:/icon --name siren-fontcustom sirensolutions/siren-fontcustom:latest -
Windows
docker run -div $PWD/icon:/icon --name siren-fontcustom sirensolutions/siren-fontcustom:latest
-
Creating and uploading the icon pack
The icon pack is a folder of custom icon files that you upload to Siren Investigate.
-
Execute the following command to generate the icon pack:
docker exec siren-fontcustom sh -c "cd /icon && fontcustom compile --name 'my-font-family' --selector=.my-icon-{{glyph}}"You can update the previous command to change the
fontcustomparameters before runningdocker exec:-
The --name flag defines the font-family name
-
The --selector flag defines the icon prefix
Both flags must be unique every time you generate an icon pack. In this example, .my-icon-is the prefix (note the dot) and{{glyph}}is the placeholder for the icon name. You must keep the dot and placeholder as shown.Output result
The icon pack is created in the same folder that was mounted with the Docker container:
/tmp/iconor$PWD/icon. The name of the folder is the same as the--nameflag used in the command. Do not change any of the files in this folder.
-
-
Create a ZIP file of the folder.
-
In Investigate, go to Management > Icon Packs > Import and upload the ZIP file. When the upload is complete the icon pack is displayed.
For information about using icons, see Editing entity tables. You can search for a custom icon by its name or the prefix you used to create the icon pack.