Setting up SAML and Keycloak on Elasticsearch with X-pack
To set up SAML and Keycloak you must:
-
Configure keycloak.
-
Configure Elasticsearch.
-
Configure Siren Investigate.
Prerequisites
Ensure you have the following folders:
-
KEYCLOAK_BASE_DIR
-
ELASTICSEARCH_BASE_DIR
-
INVESTIGATE_BASE_DIR
-
TEMP_FOLDER
Configuring Keycloak
-
Start keycloak. In the parent directory, execute the following command:
cd KEYCLOAK_BASE_DIR bin/kc.sh start-dev -
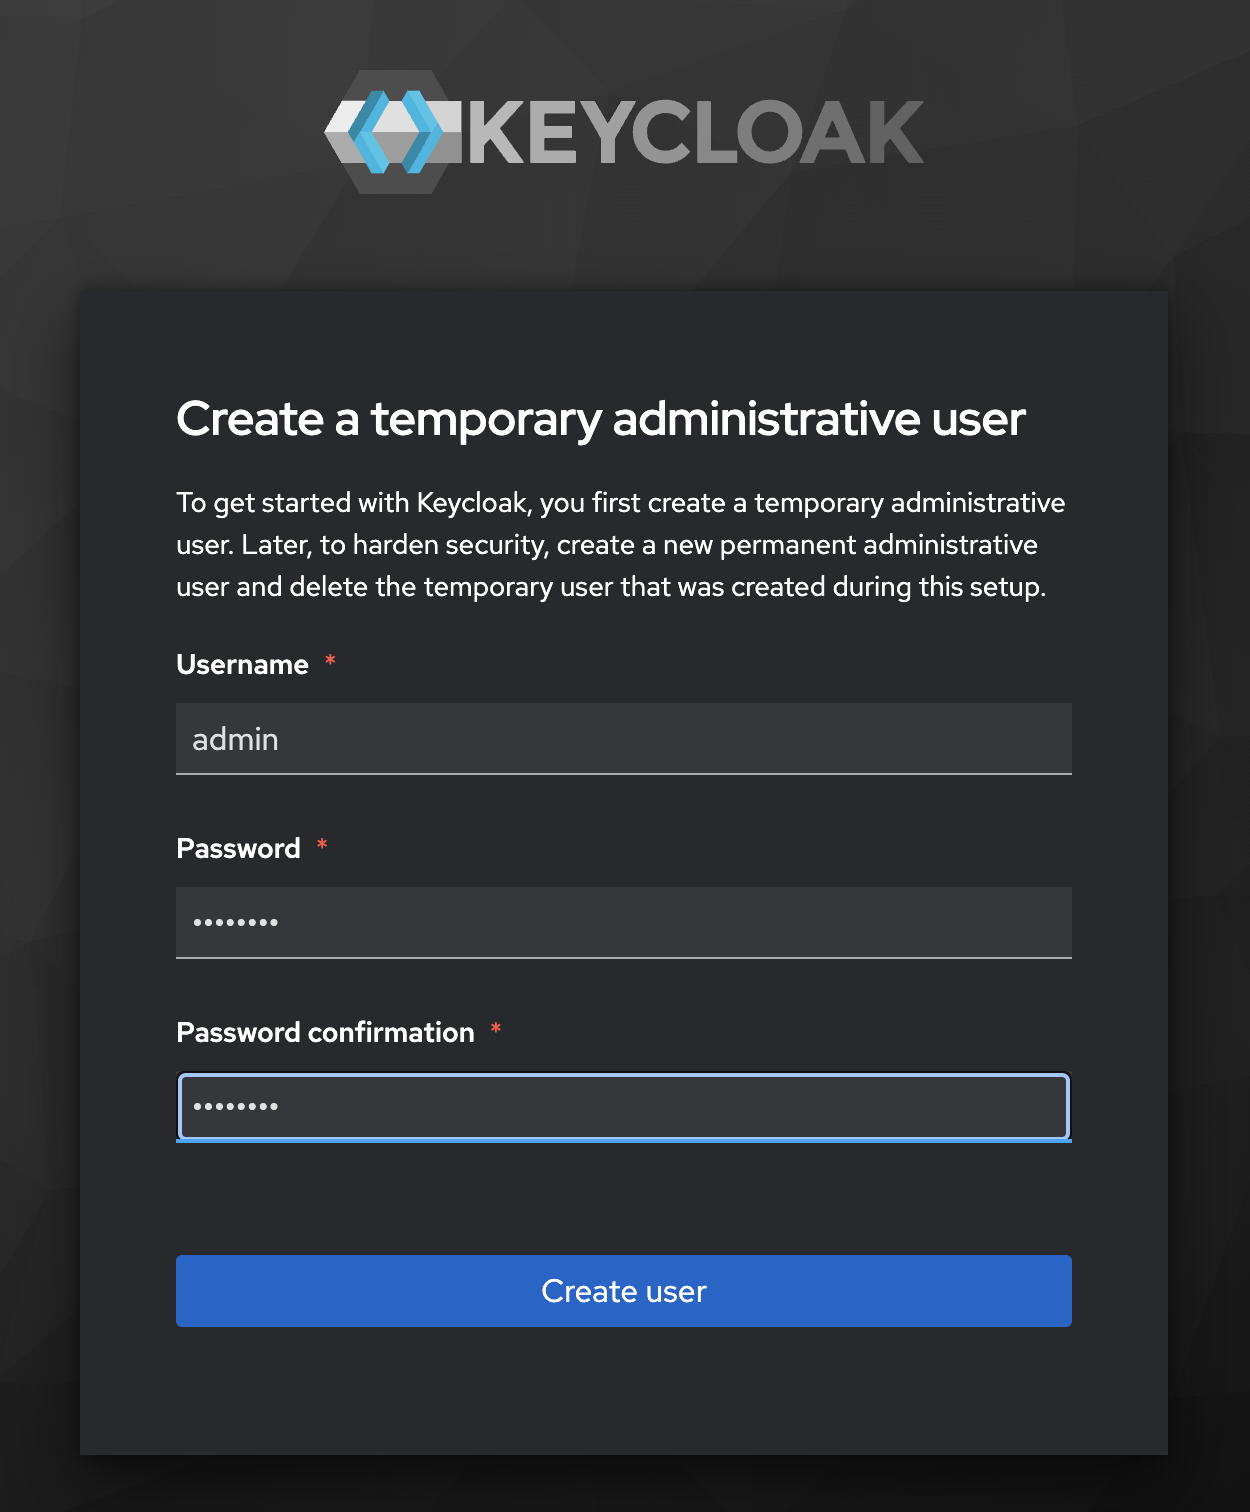
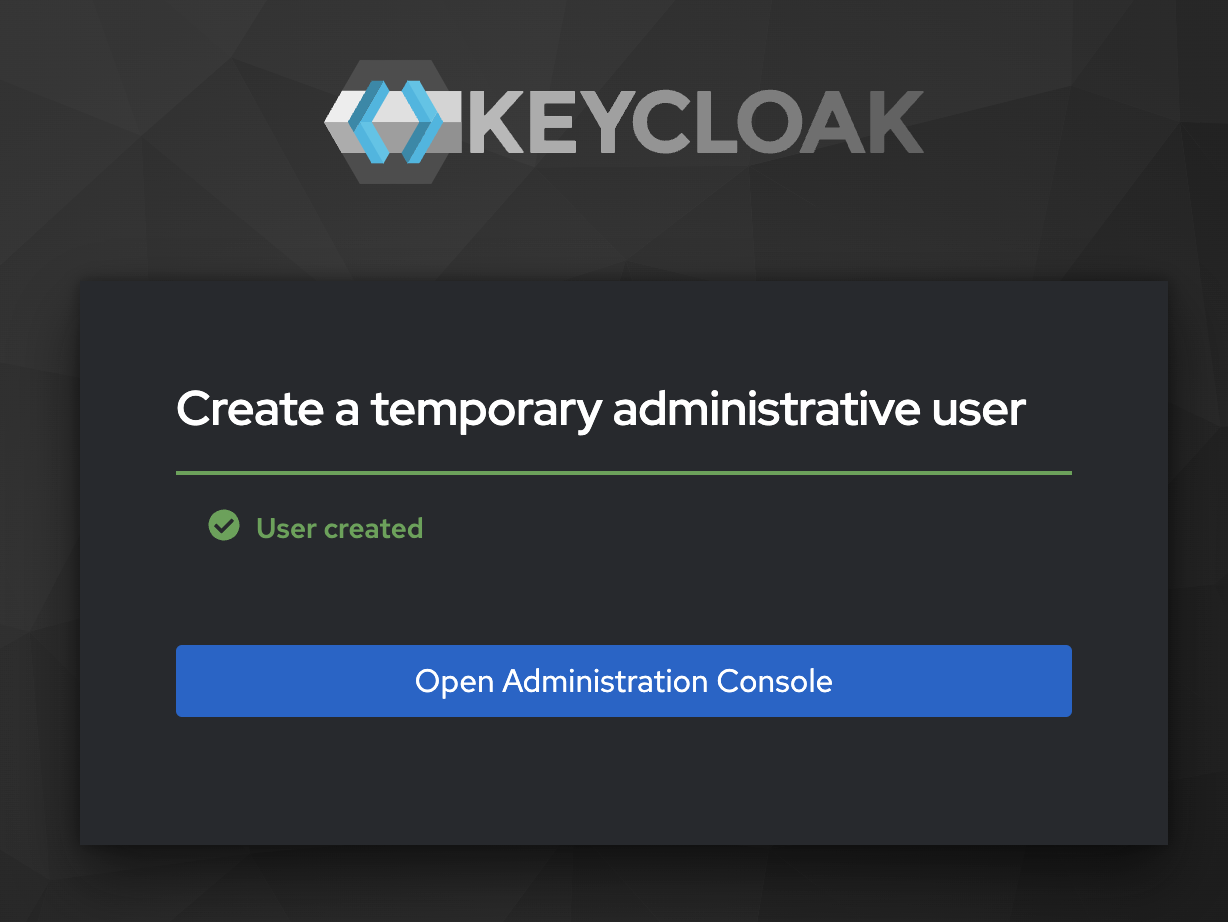
In a browser, open localhost:8080 and create an admin user:
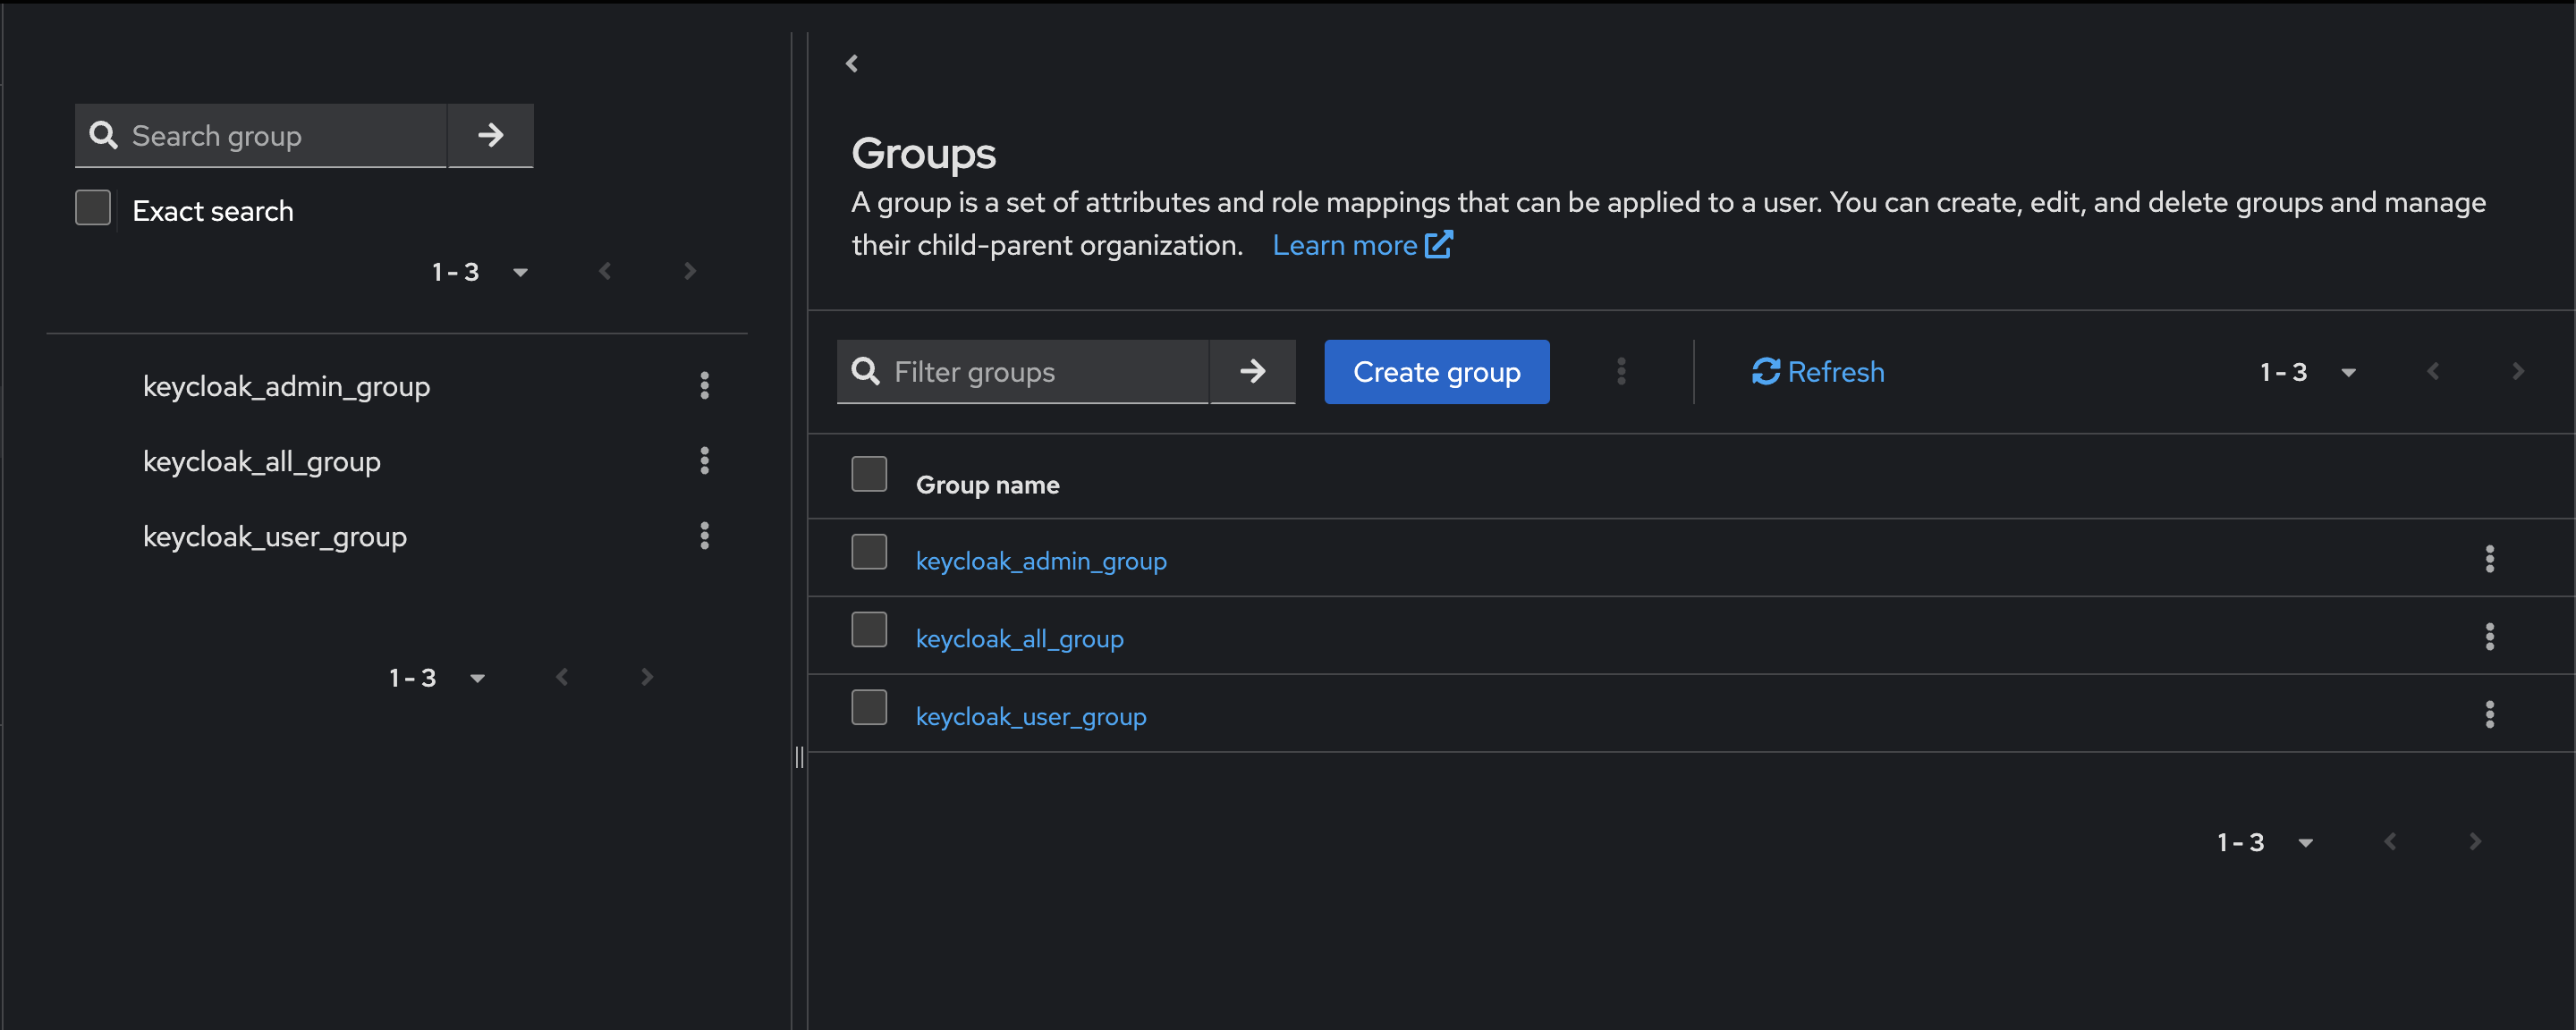
Configuring realm groups
Create the groups
keycloak_all_group, keycloak_user_group, and keycloak_admin_group.
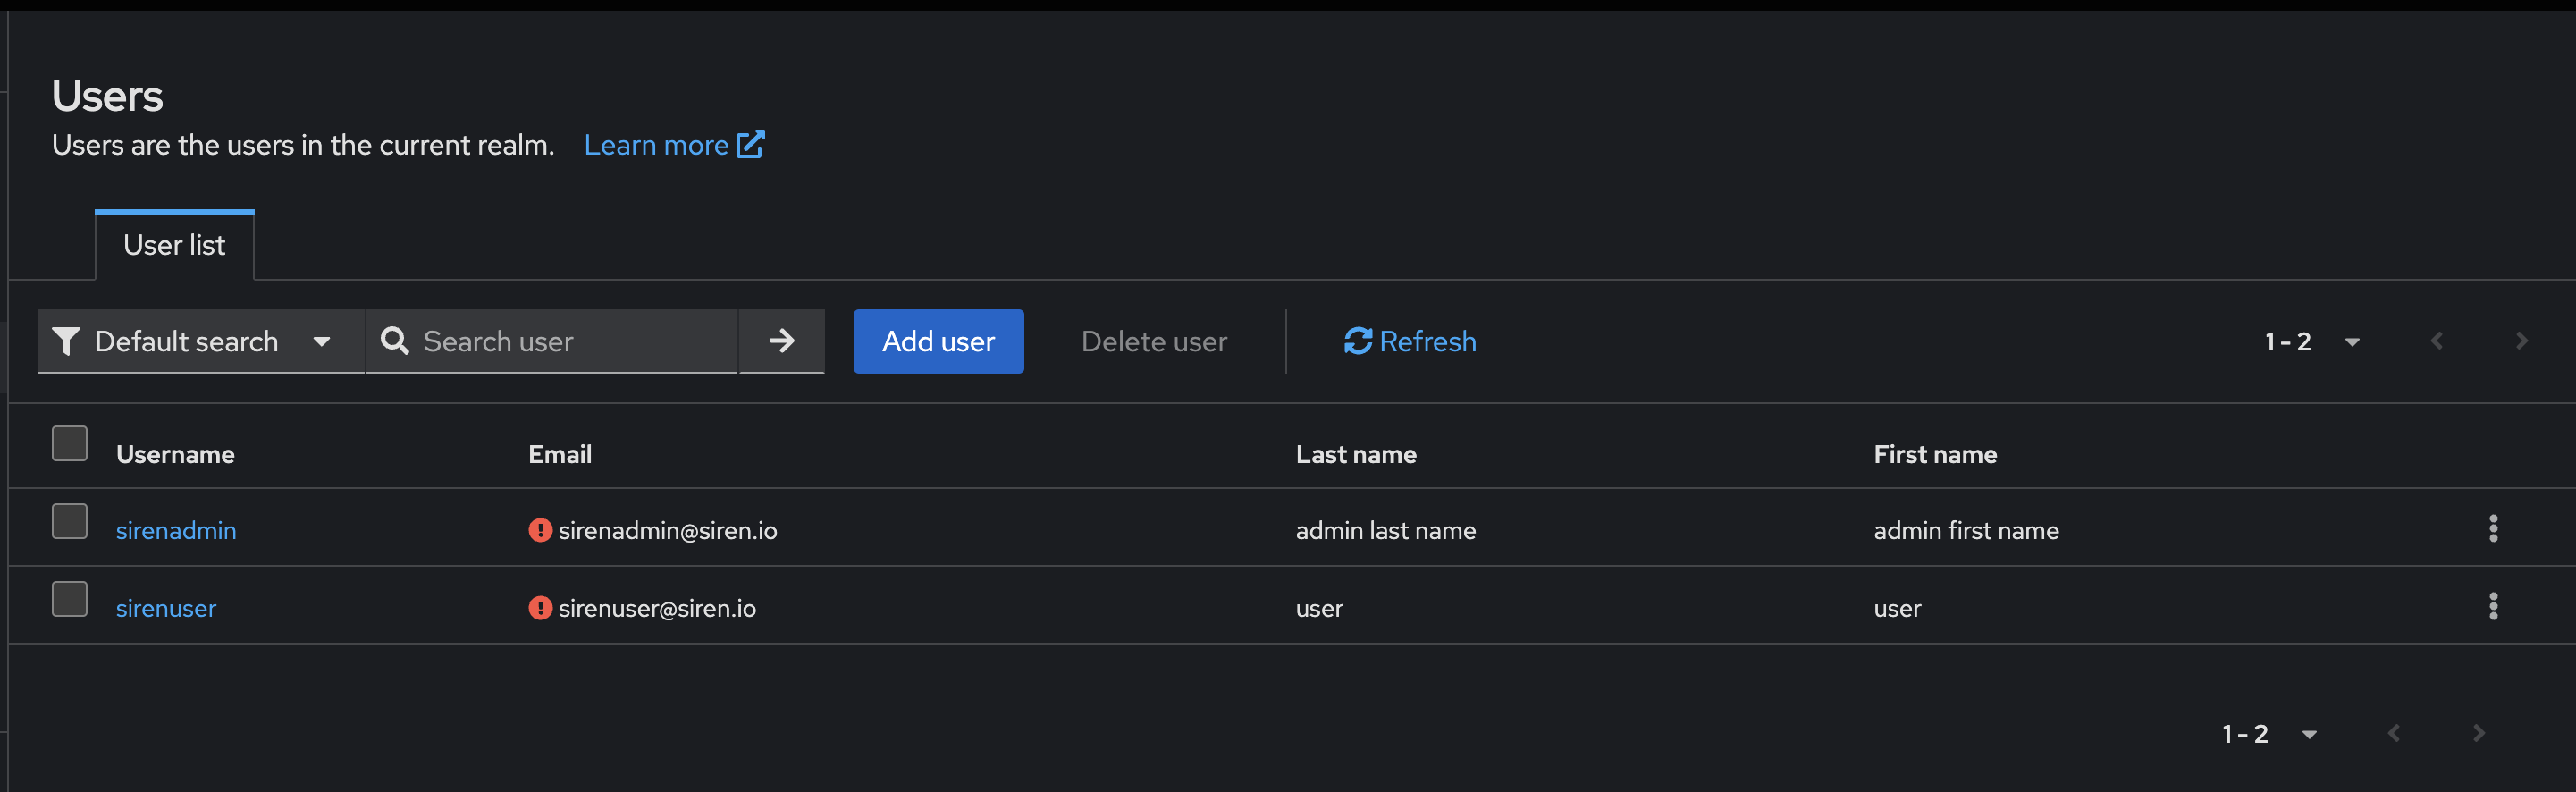
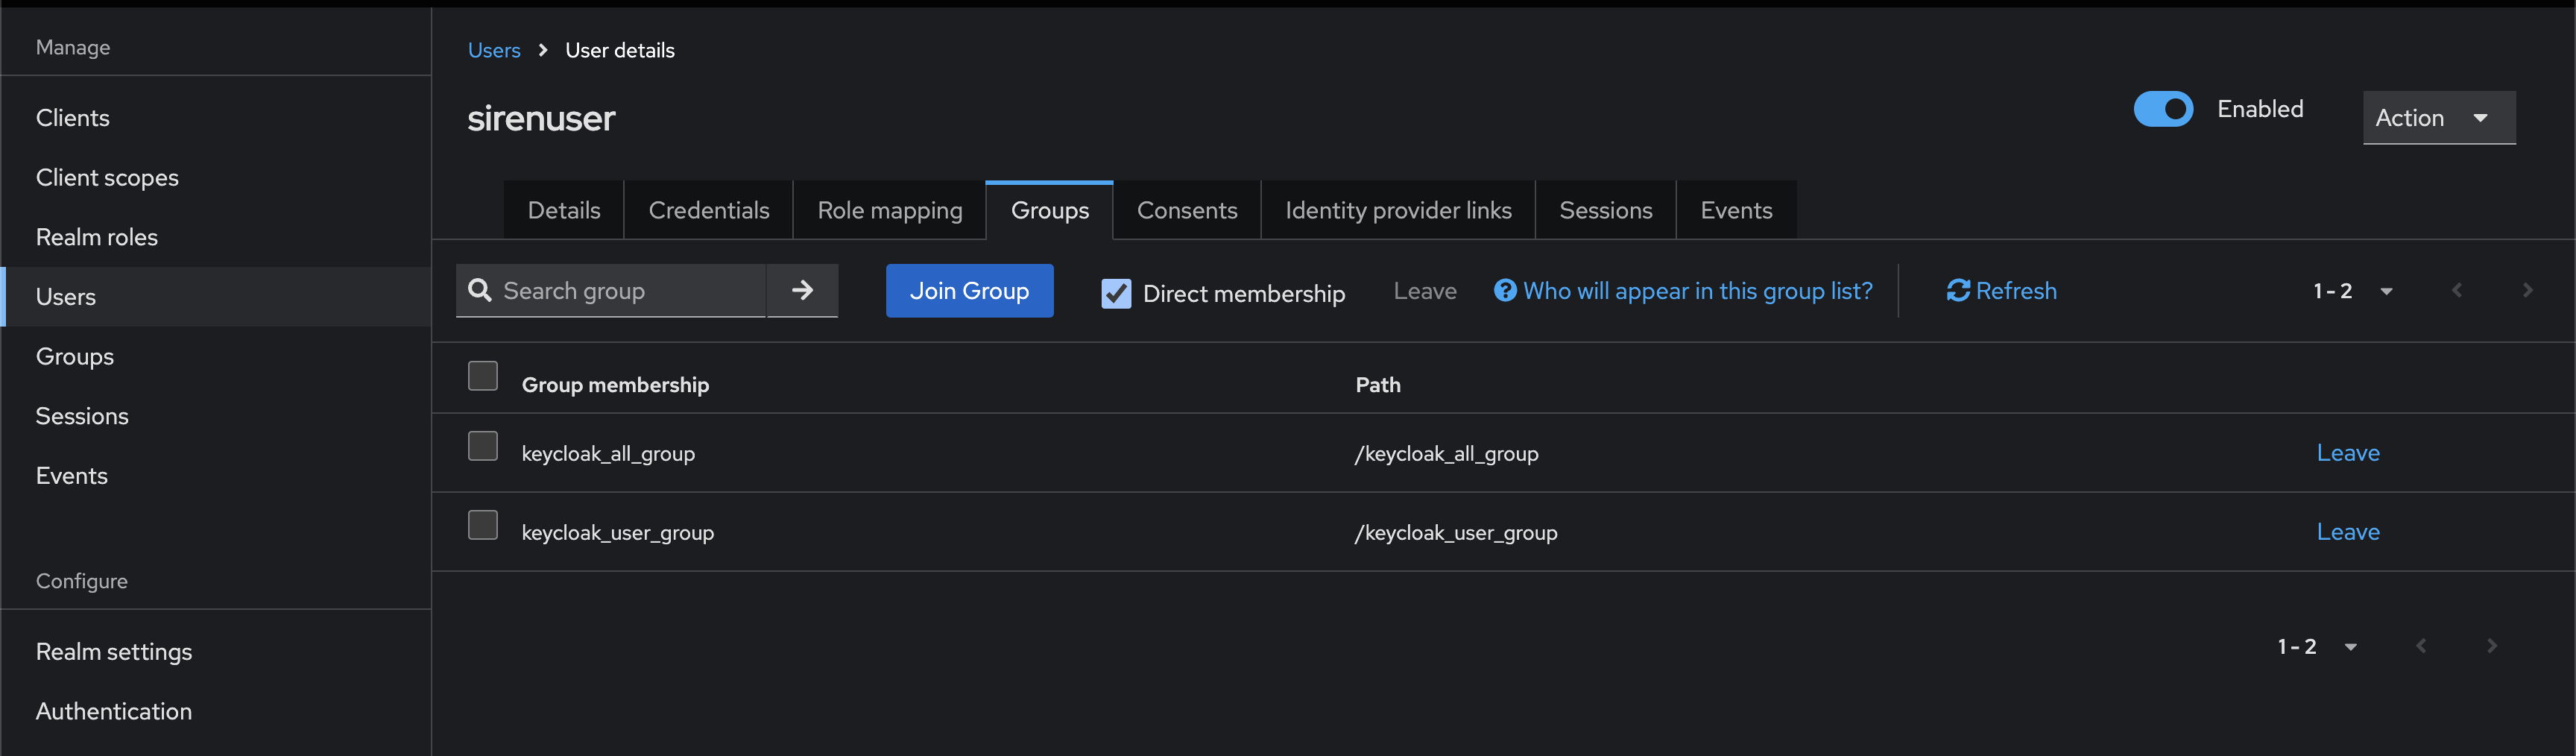
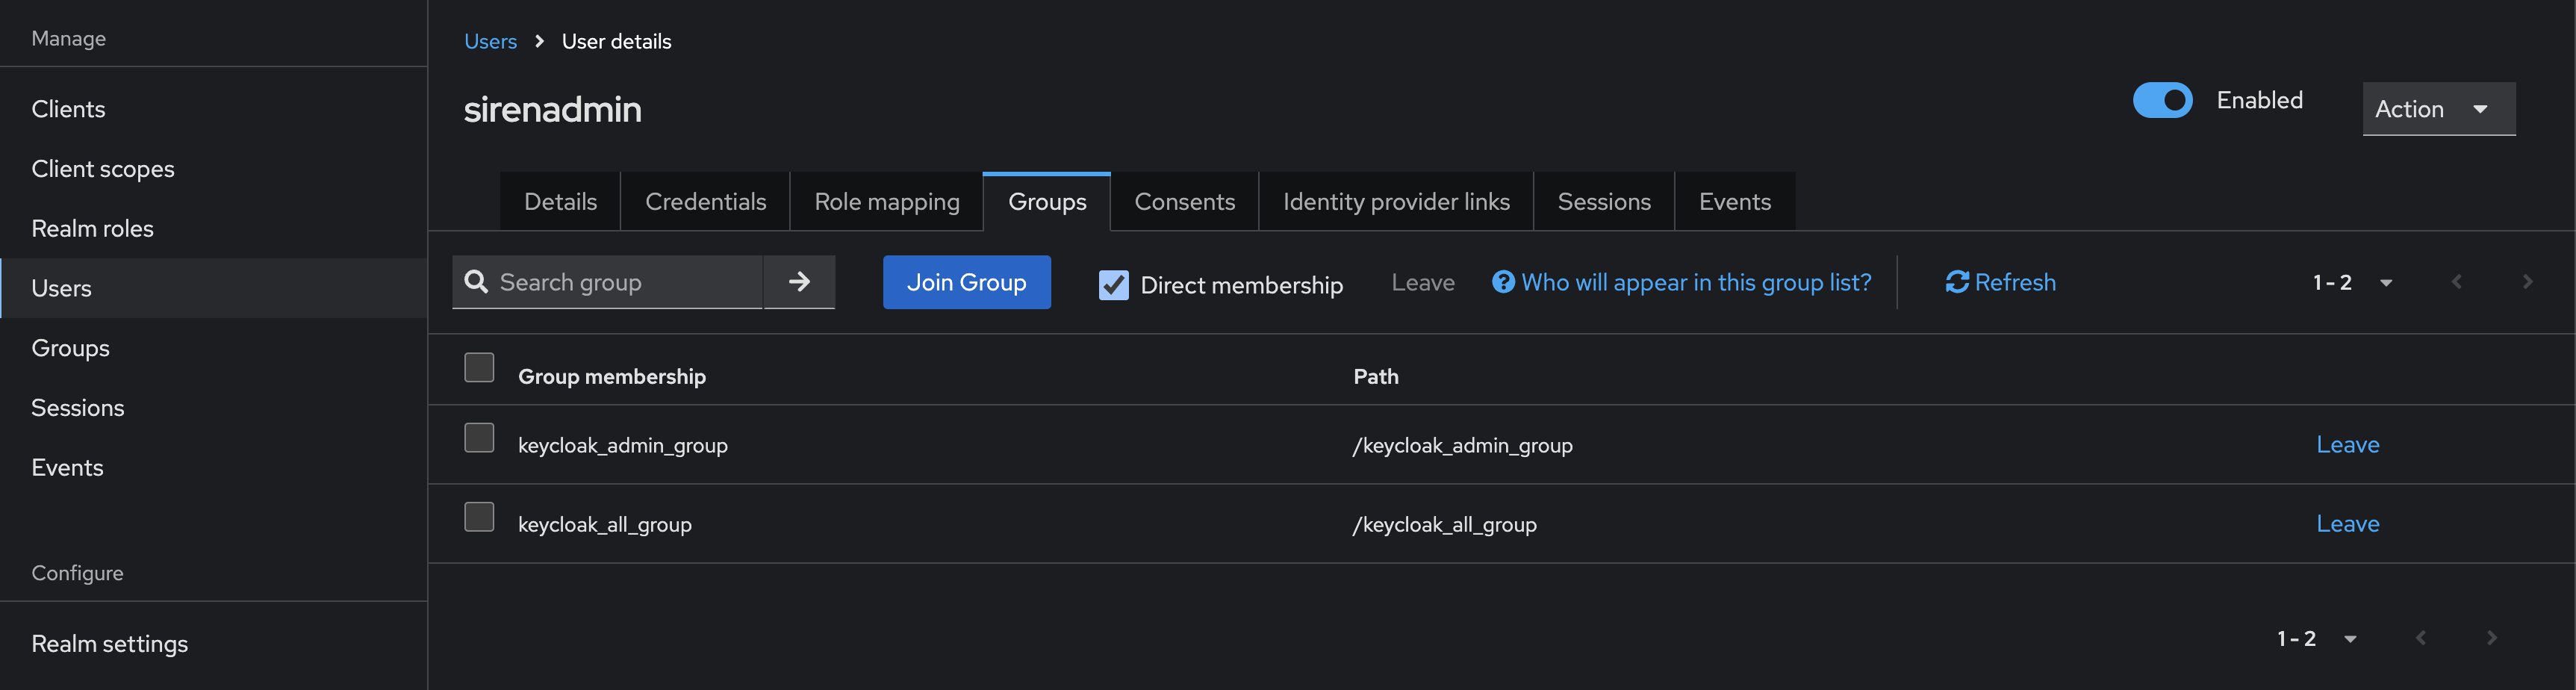
Assigning users to groups
Assign users to following groups:
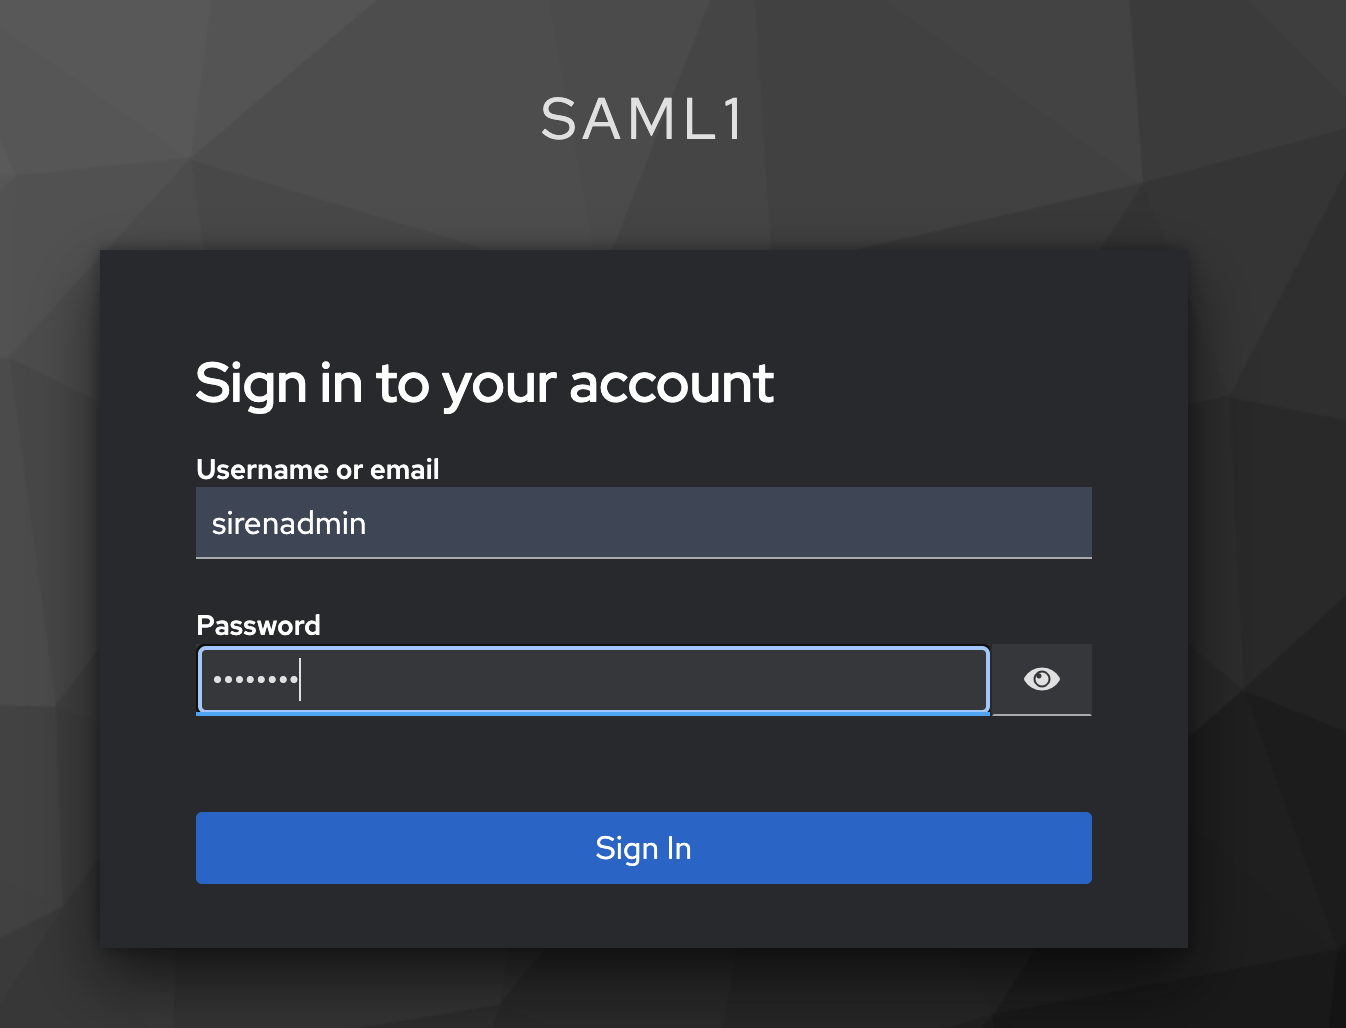
sirenadmin → keycloak_all_group, keycloak_admin_group
sirenuser → keycloak_all_group, keycloak_user_group
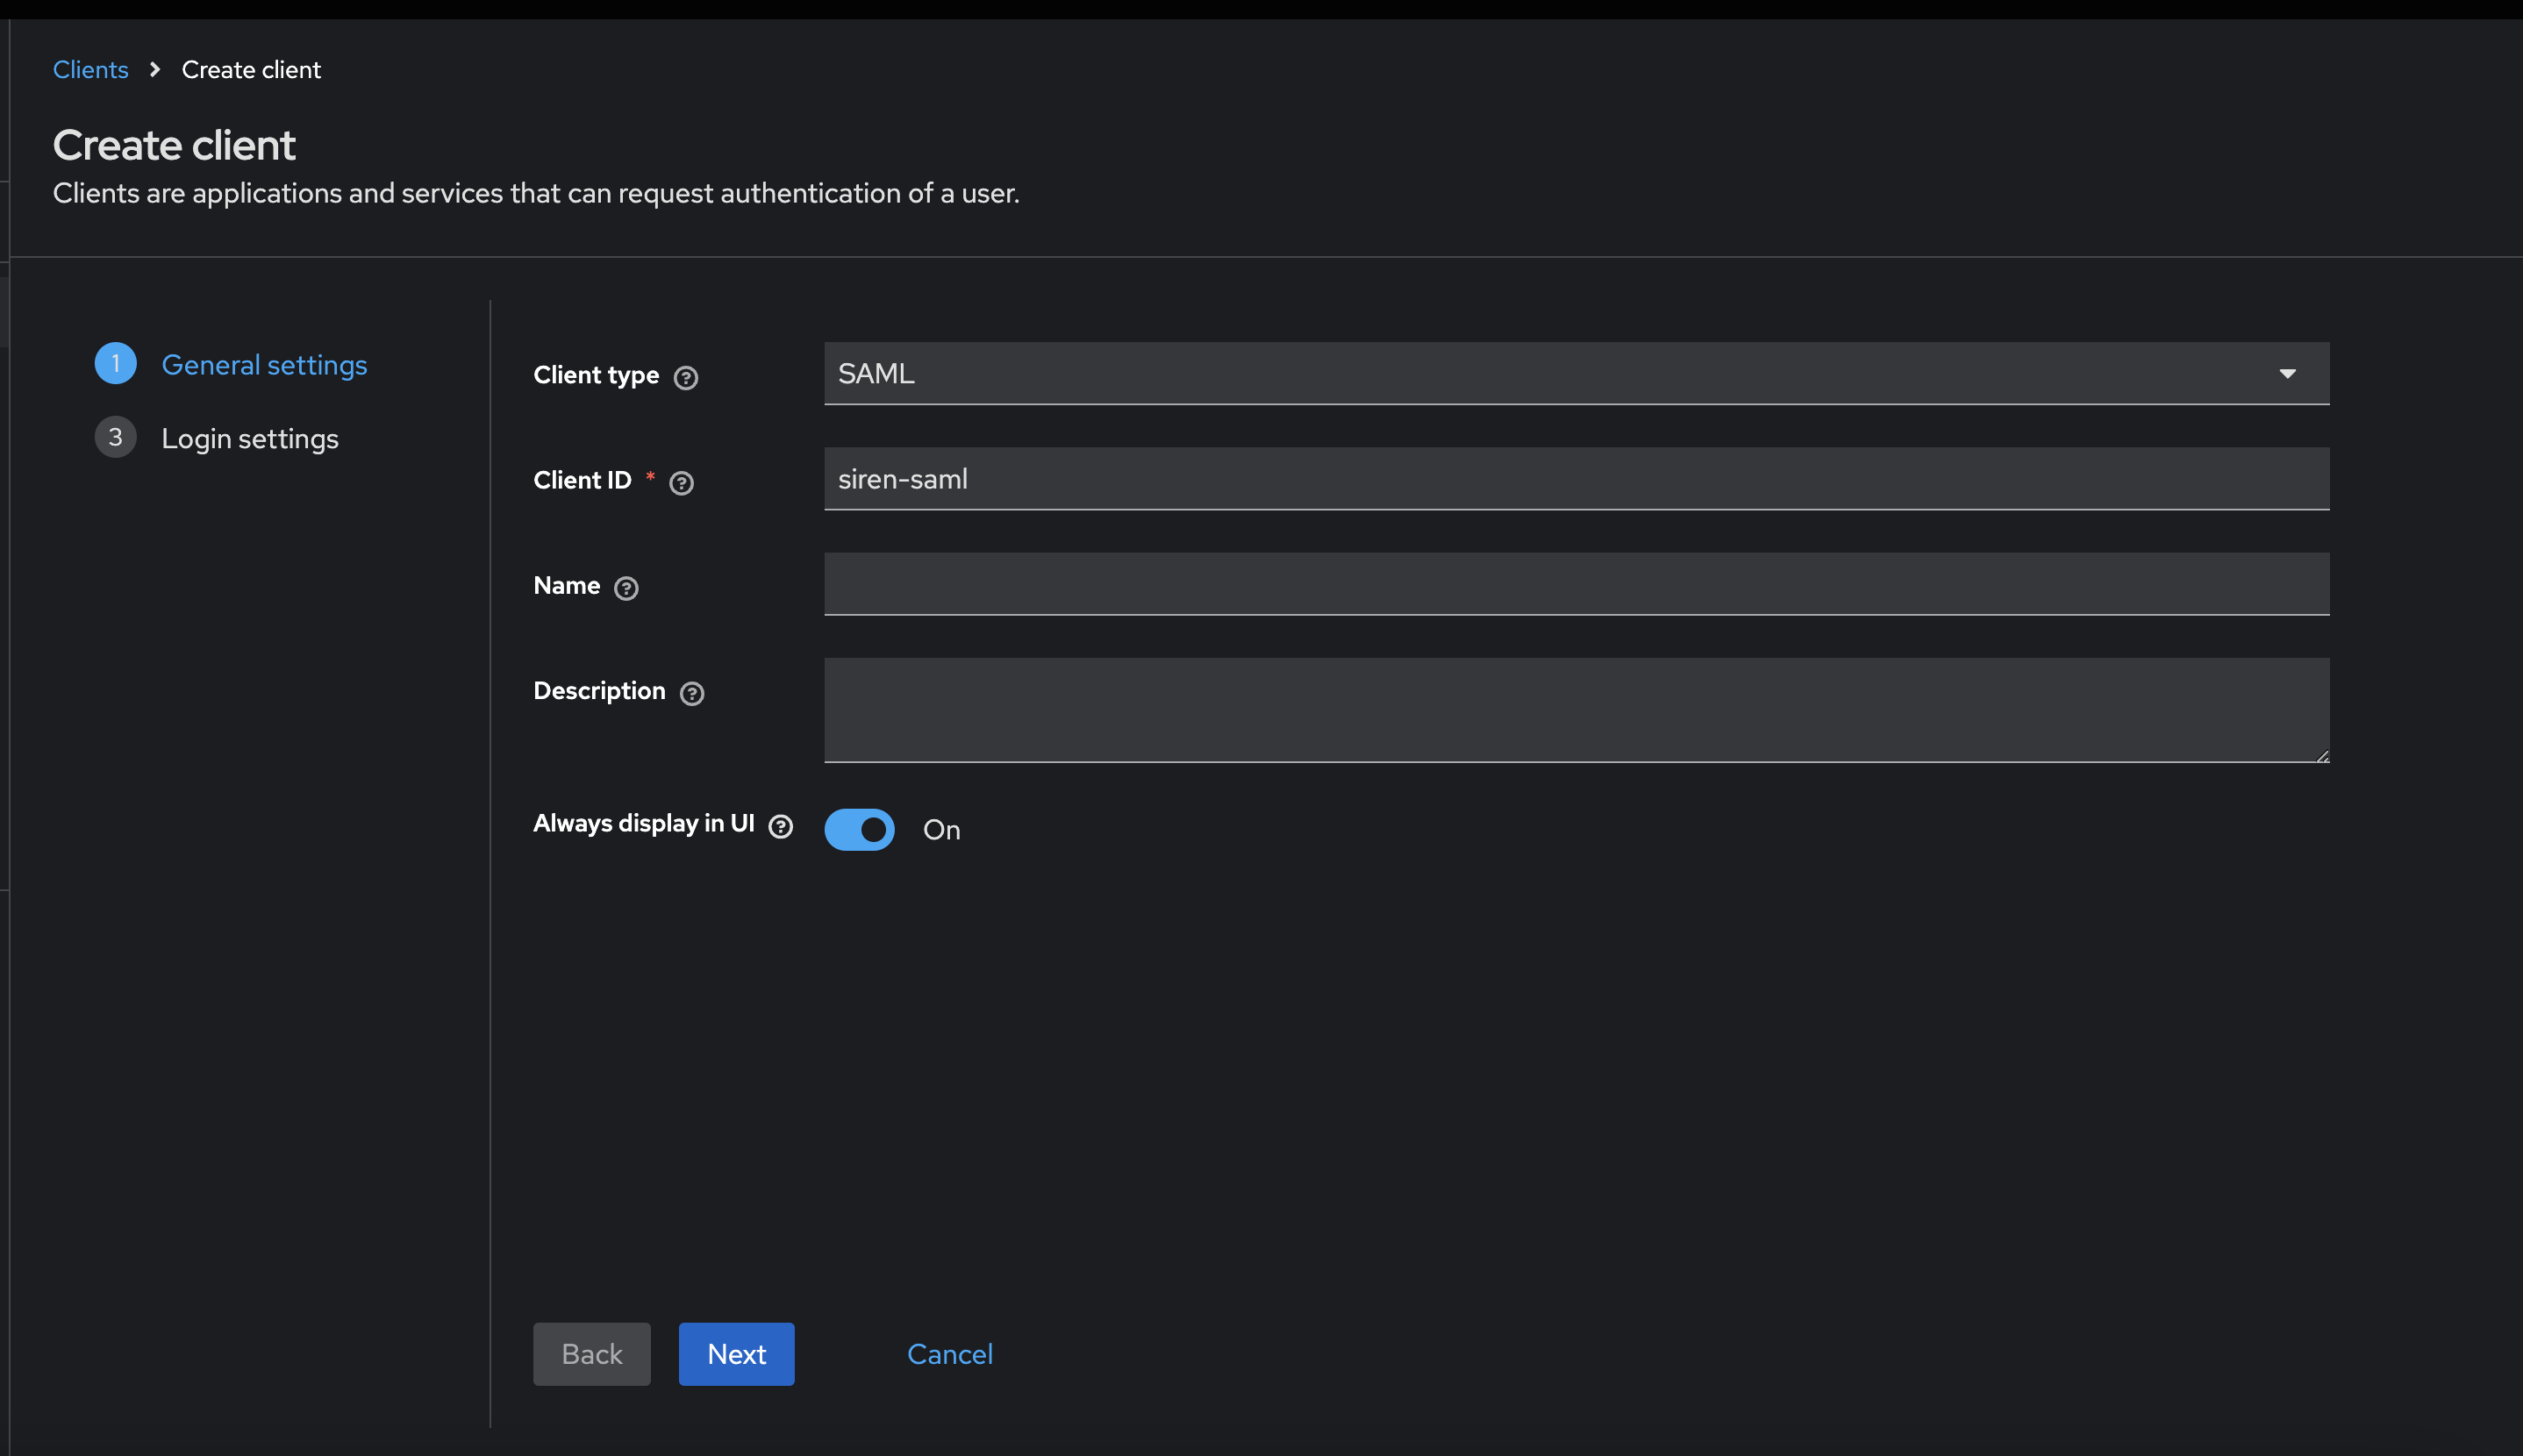
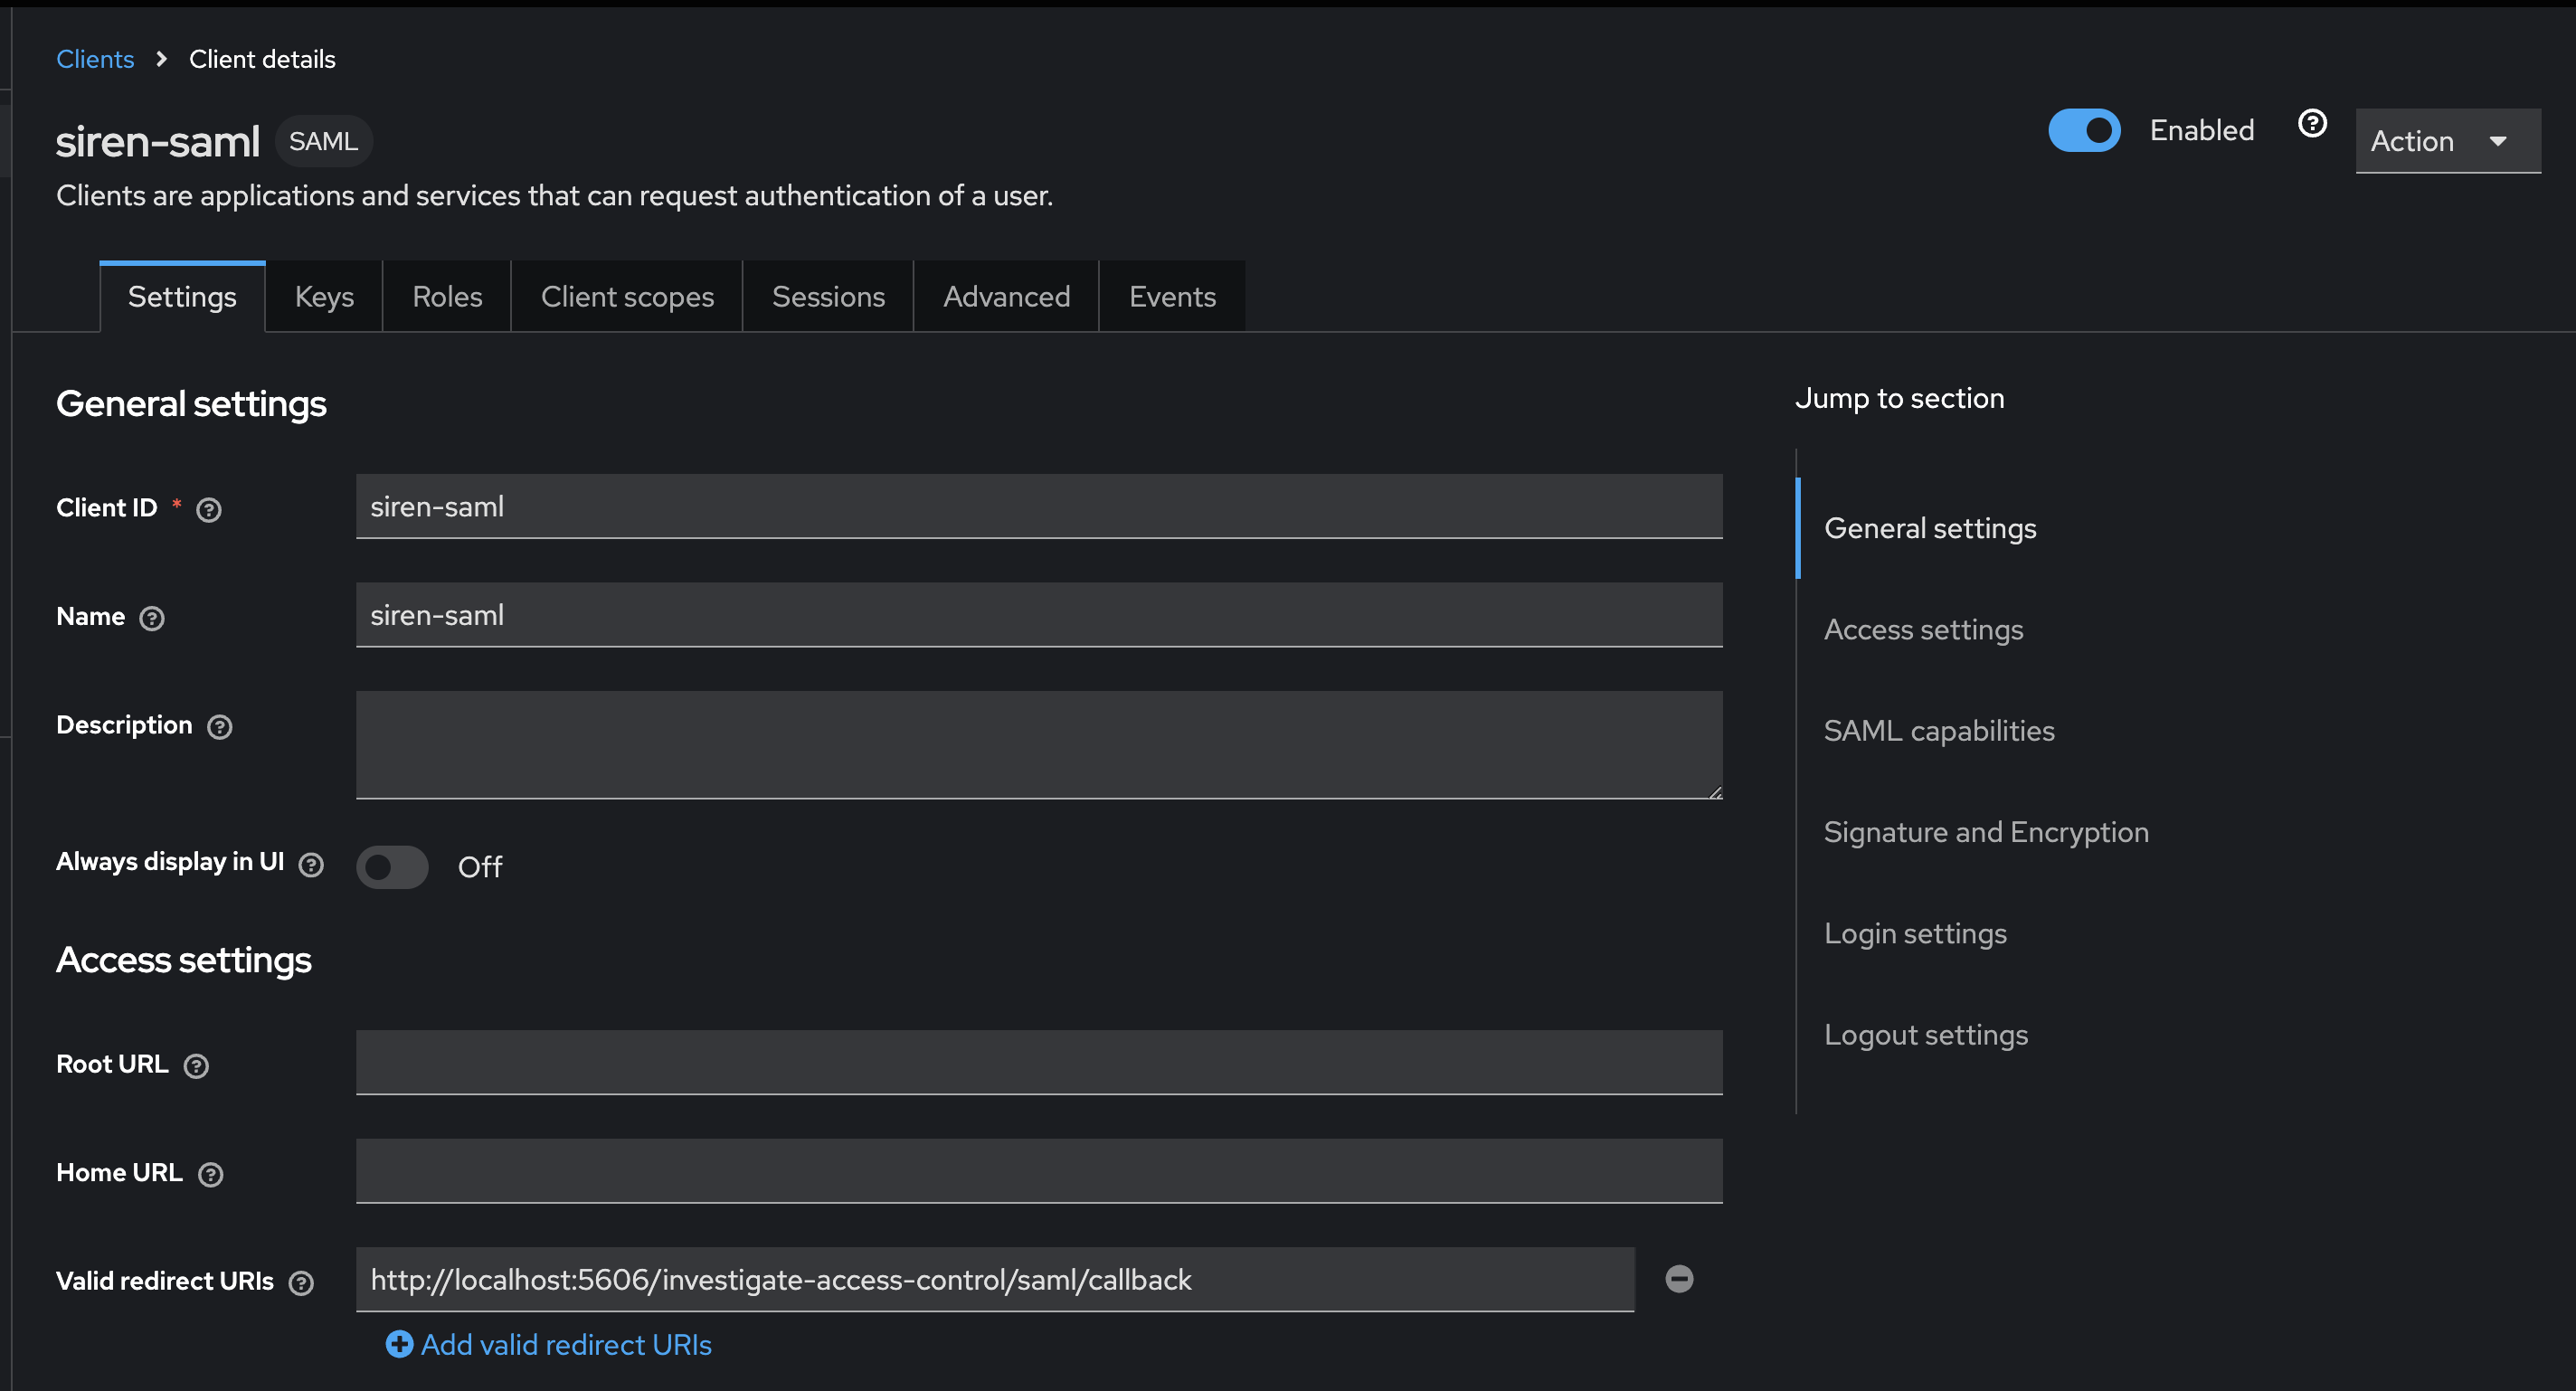
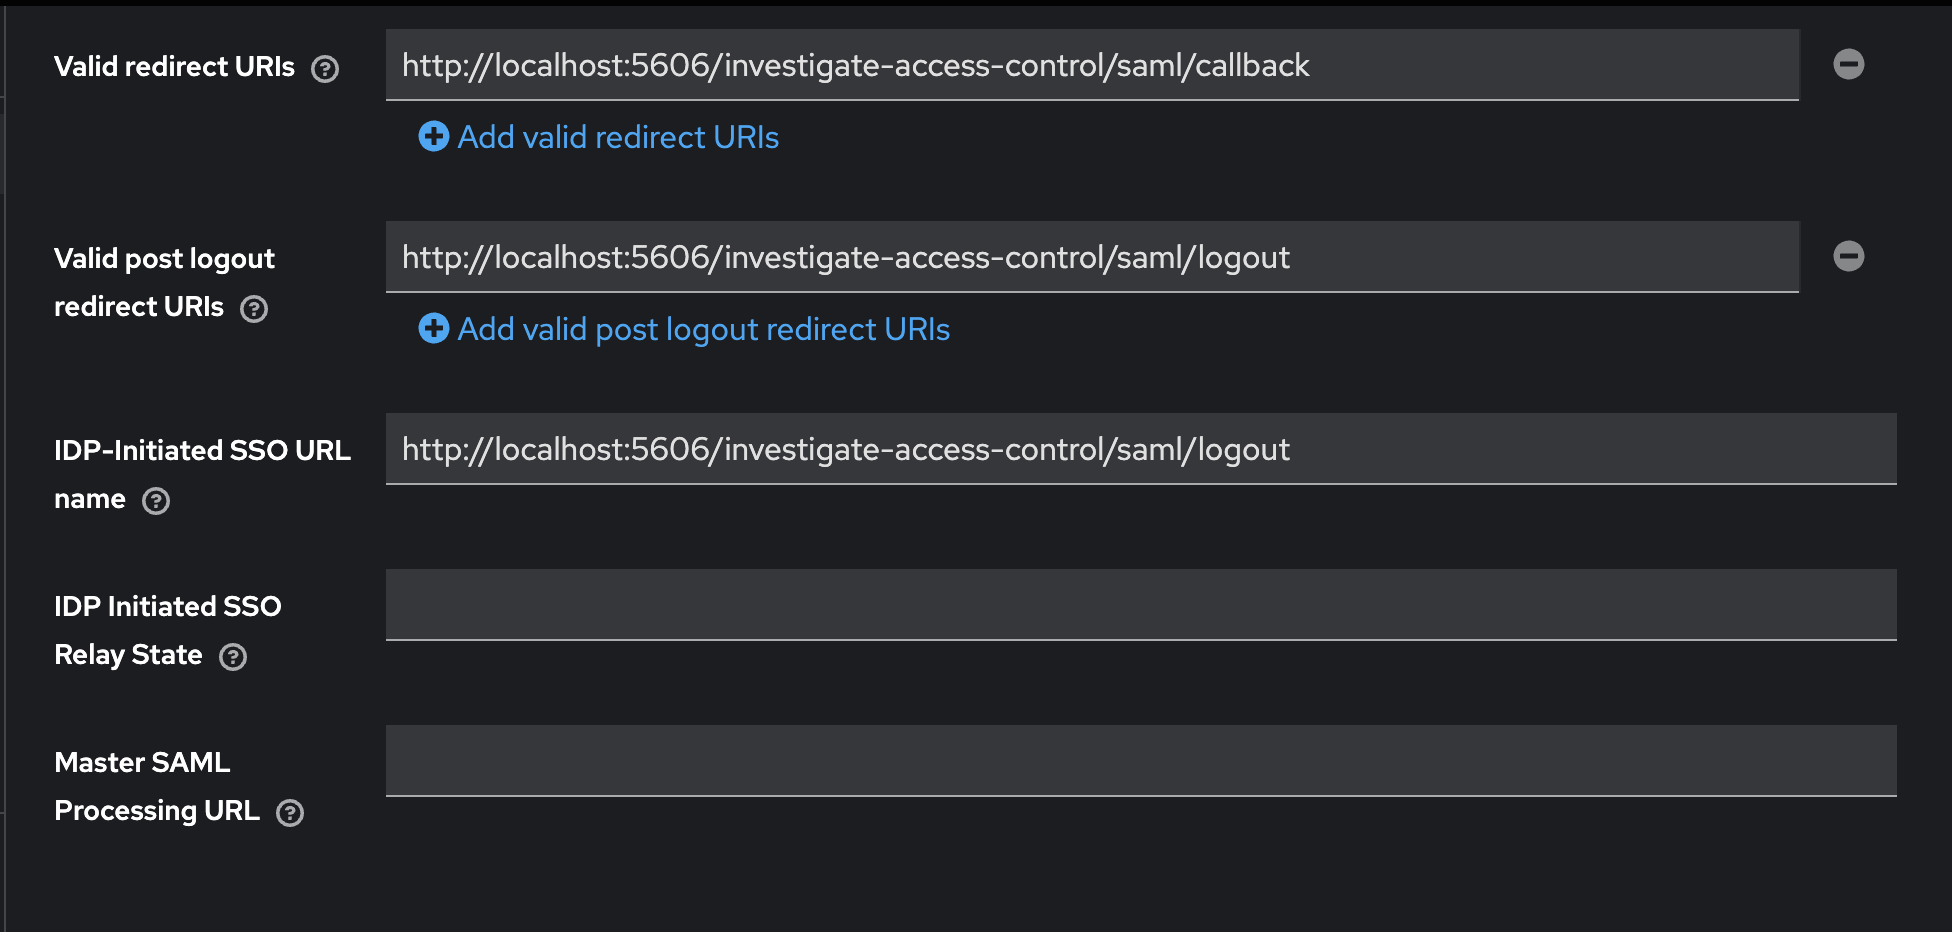
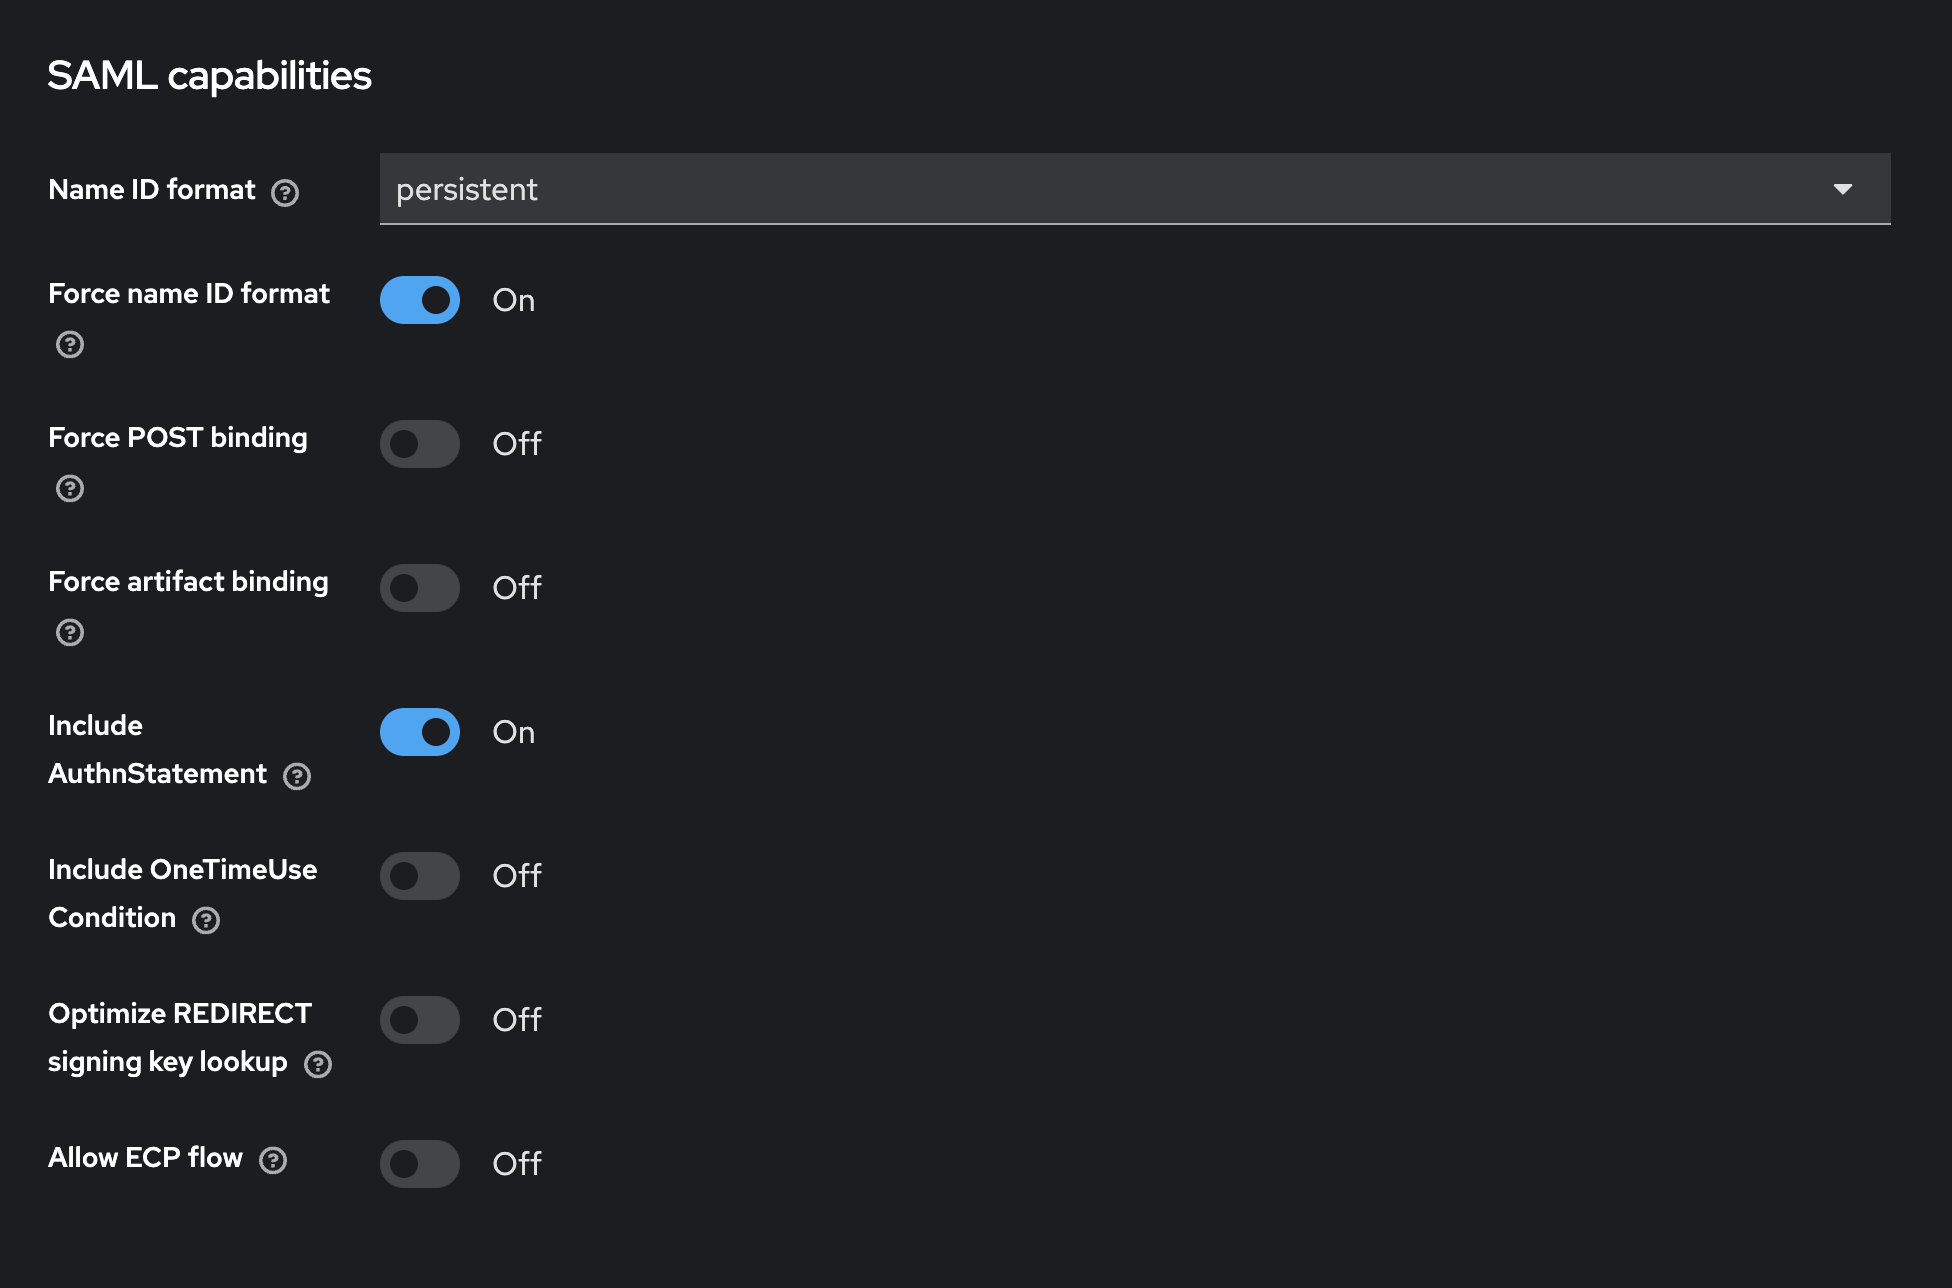
Creating new client siren-saml
-
Create the client.
-
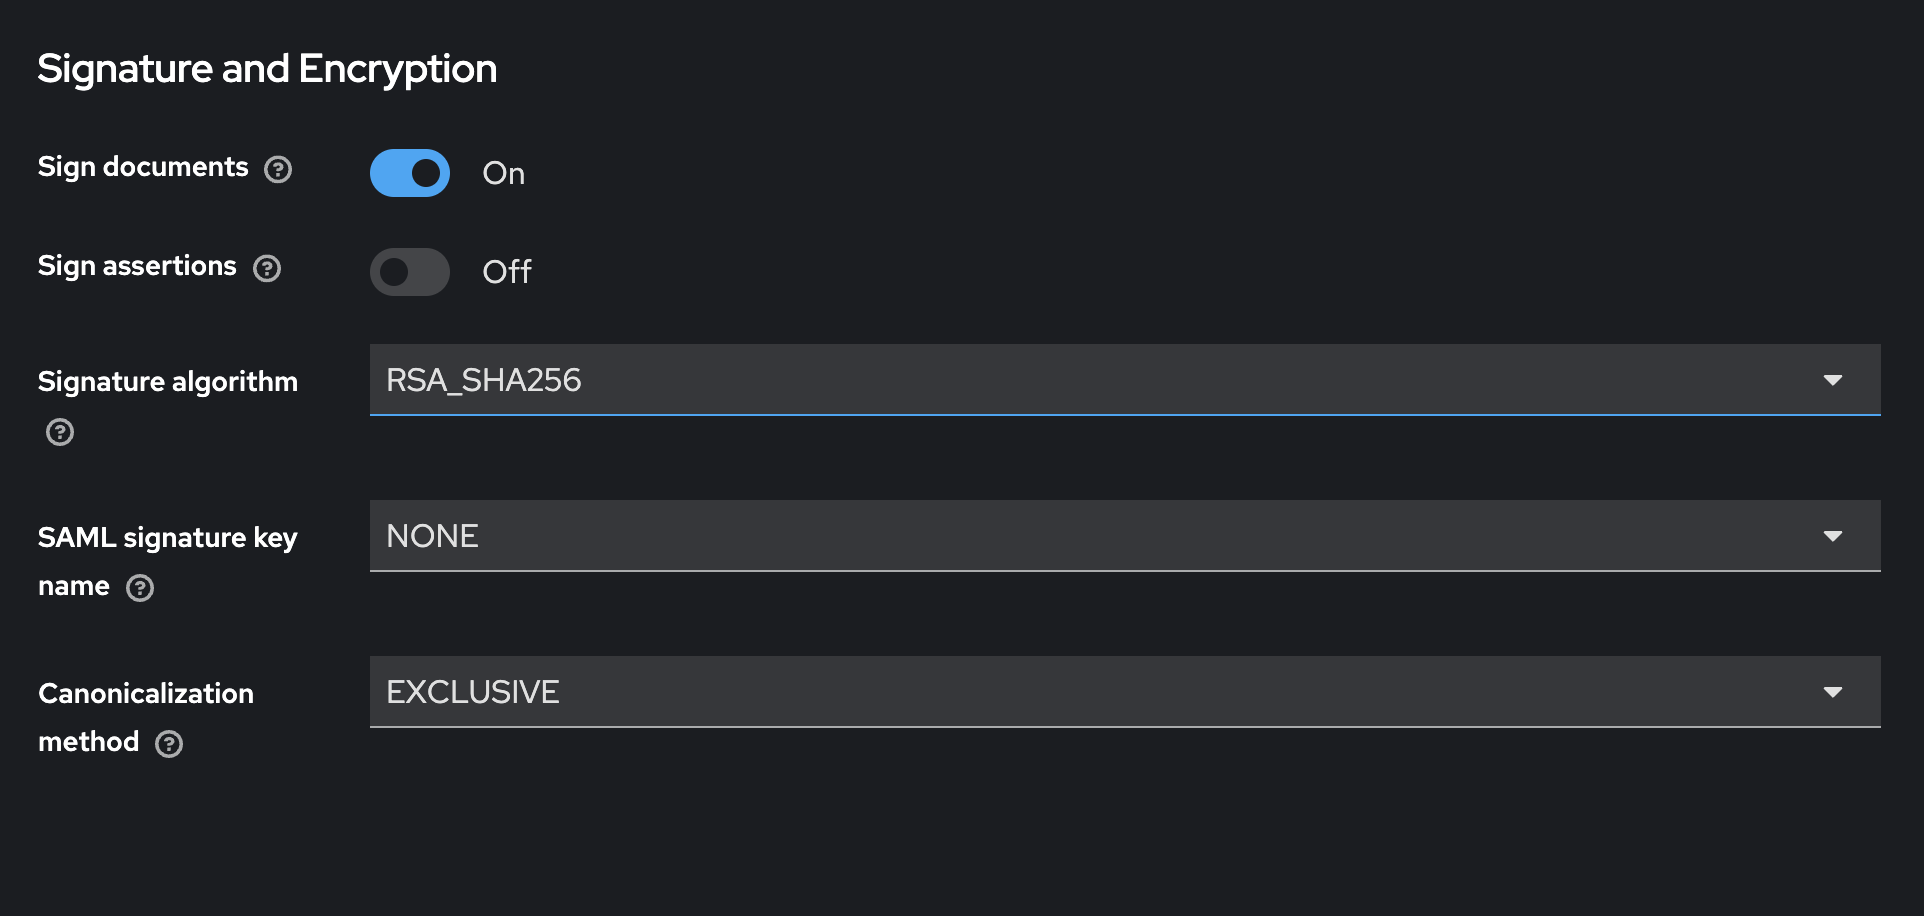
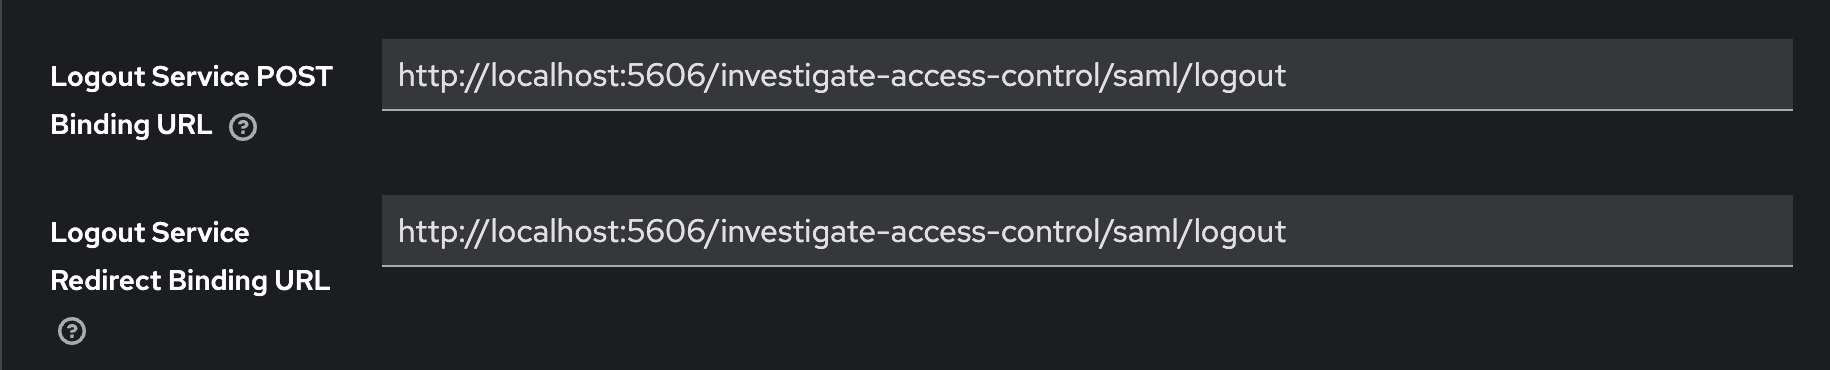
Configure client settings.
-
Configure client advanced settings.
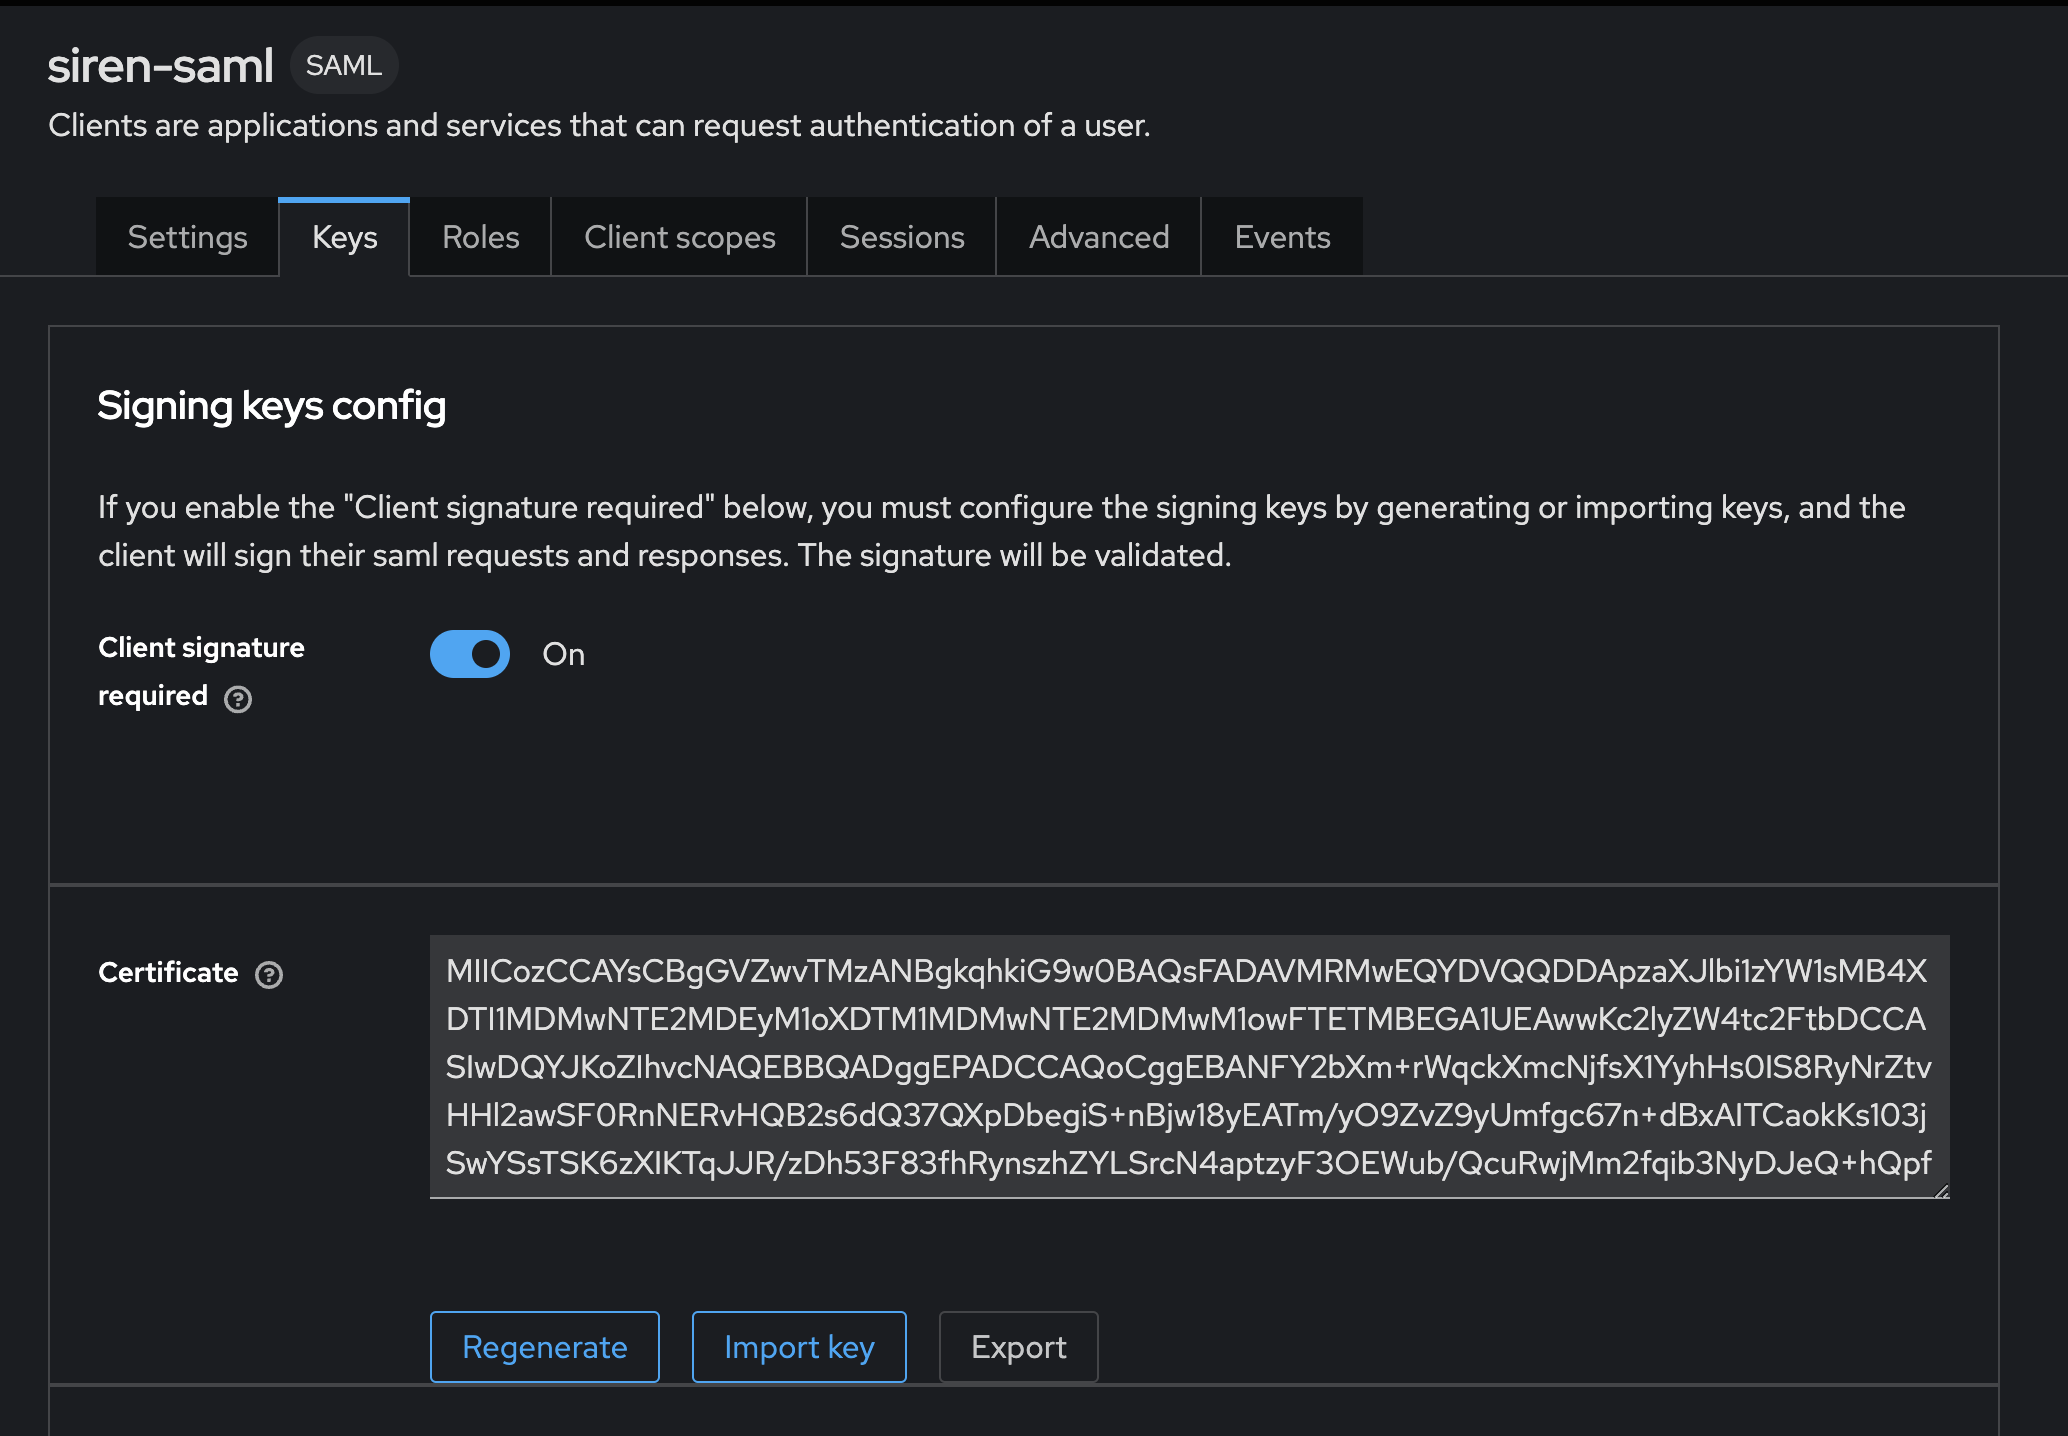
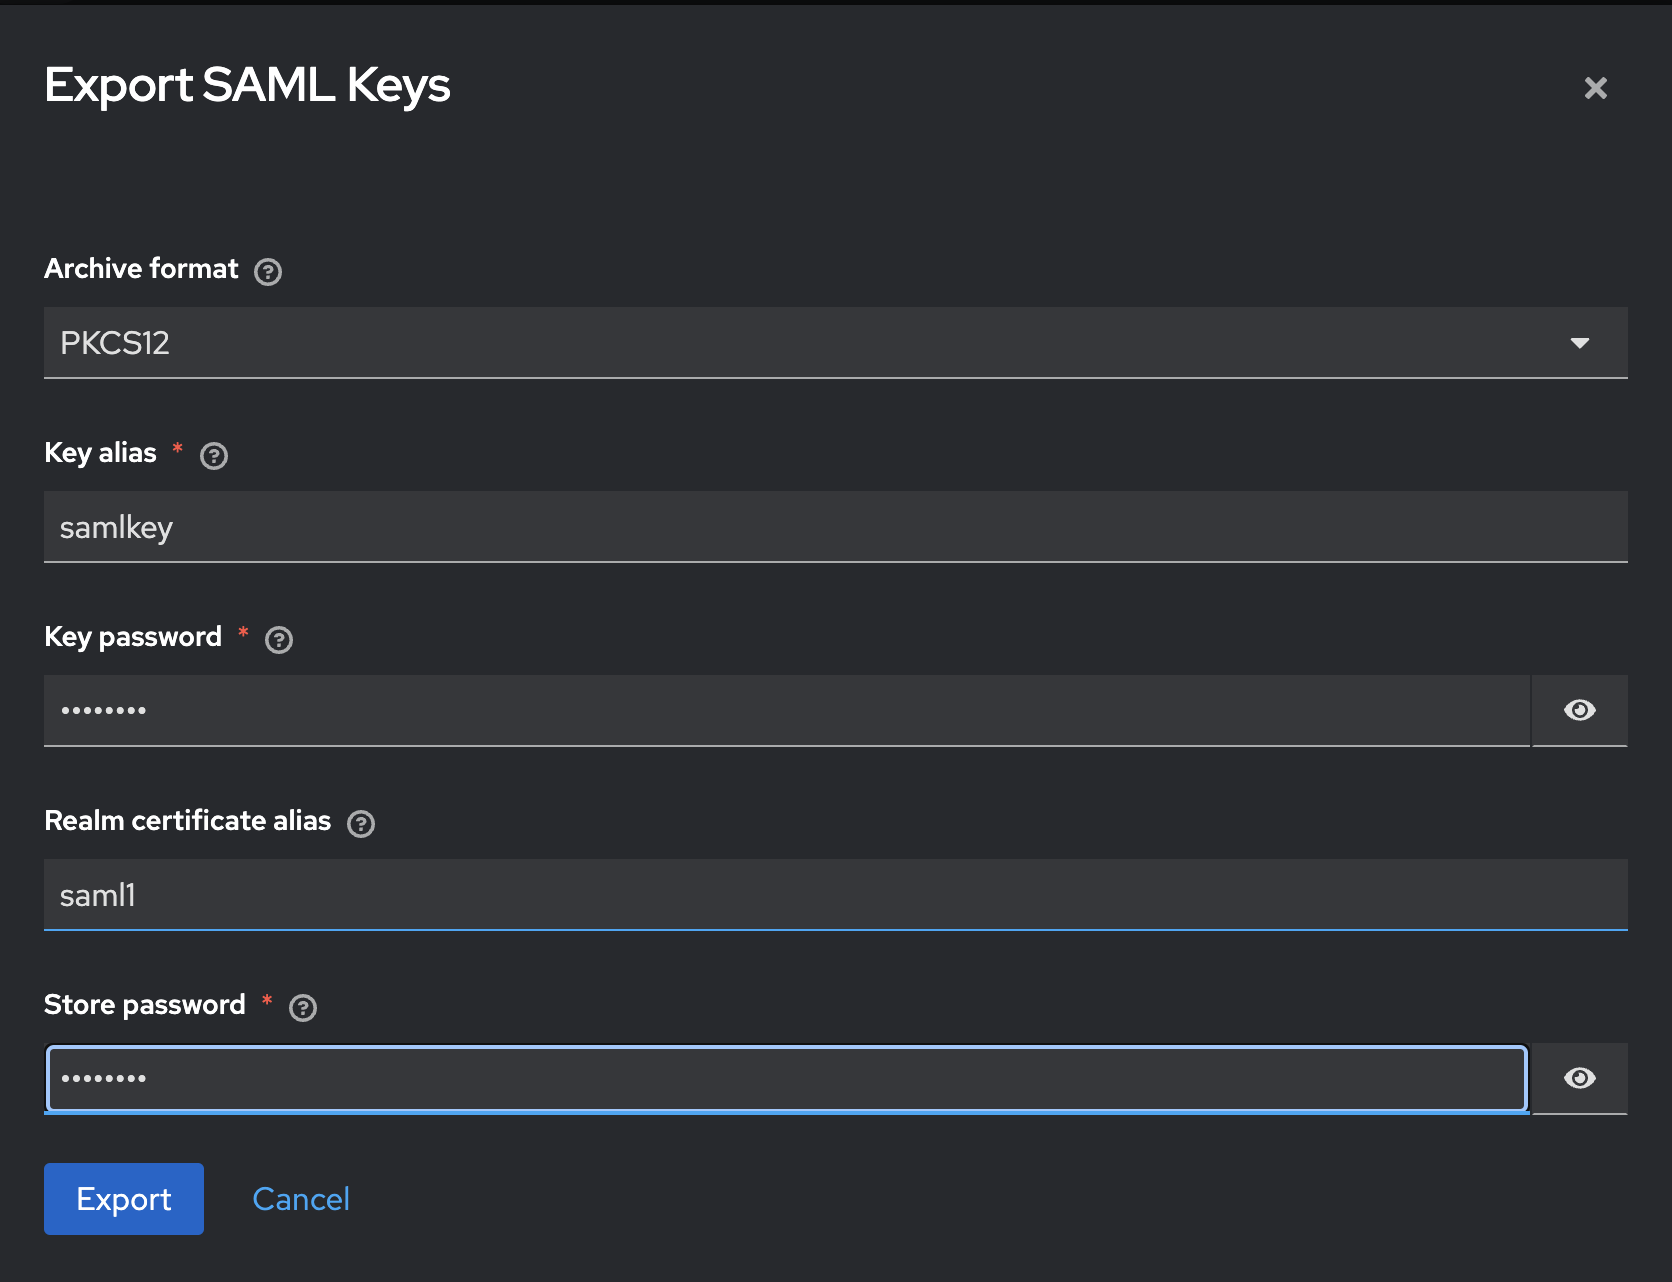
Exporting keys from client as p12 keystore
-
Export the keys.
-
The export should create an file called
keystore.p12. from this keystore, extract the following files which you need to configure Elasticsearch.-
Certificate
saml-sign.crtin PEM format. -
Private key
saml-sign.keyin PEM format.To do this, use 4 scripts from
INVESTIGATE_BASE_DIR/scripts/saml/p12keystore.This depends on the keycloak installation. The keystore name might be different or it might contain keys and certs with different aliases and names. It might be necessary to adjust the script’s parameters (top lines).
To do that, execute the following command:
cp keystore.p12 INVESTIGATE_BASE_DIR/scripts/saml/p12keystore/
cd INVESTIGATE_BASE_DIR/scripts/saml/p12keystore/
-
-
List the certificates' subjects:
./list-cert-subjects.sh subject=CN=siren-saml issuer=CN=siren-saml subject=CN=saml1 issuer=CN=saml1 -
In this case the client name is siren-saml so we want the cert for CN=siren-saml. If this is different you need to edit next script. Extract the cert.
./extract-cert-with-subject.sh ⚠️ Skipping entry saml1 (subject: CN=saml1) ✅ Found certificate (samlkey). Extracting cert to saml-sign.crt use list-private-keys.sh and extract-private-key-with-alias.sh to extract the private key -
List the private keys.
./list-private-keys.sh Alias name: samlkey -
Usually there is only 1 key but confirm this. Extract this one, we gave
samlkeywhen extracting the store (if different you will have to edit next script)./extract-private-key-with-alias.sh Importing keystore keystore.p12 to temp-keystore.p12... -
List the directory to confirm the cert and key file in our INVESTIGATE_BASE_DIR/scripts/saml/p12keystore folder:
ls -l saml* -rw-r--r--@ 1 szydan staff 991 14 Mar 13:27 saml-sign.crt -rw-r--r--@ 1 szydan staff 1704 14 Mar 13:29 saml-sign.key -
Copy these files to TEMP_FOLDER, you use them later to configure Elasticsearch.
cp INVESTIGATE_BASE_DIR/scripts/saml/p12keystore/saml-sign.crt INVESTIGATE_BASE_DIR/scripts/saml/p12keystore/saml-sign.key TEMP_FOLDER/
Adding mappers
Keycloak is not always exposing mappers UI. If there is no UI the only way to configure required mappers is to use Keycloak REST API. The script below is adding 2 mappers to map username and groups to metadata properties. You need those to configure correct mapping between keycloak groups and es roles.
Execute the following command:
cd INVESTIGATE_BASE_DIR/scripts/saml/mappers
./add-mappers.sh
Extracting keyclock-idp-metadata.xml
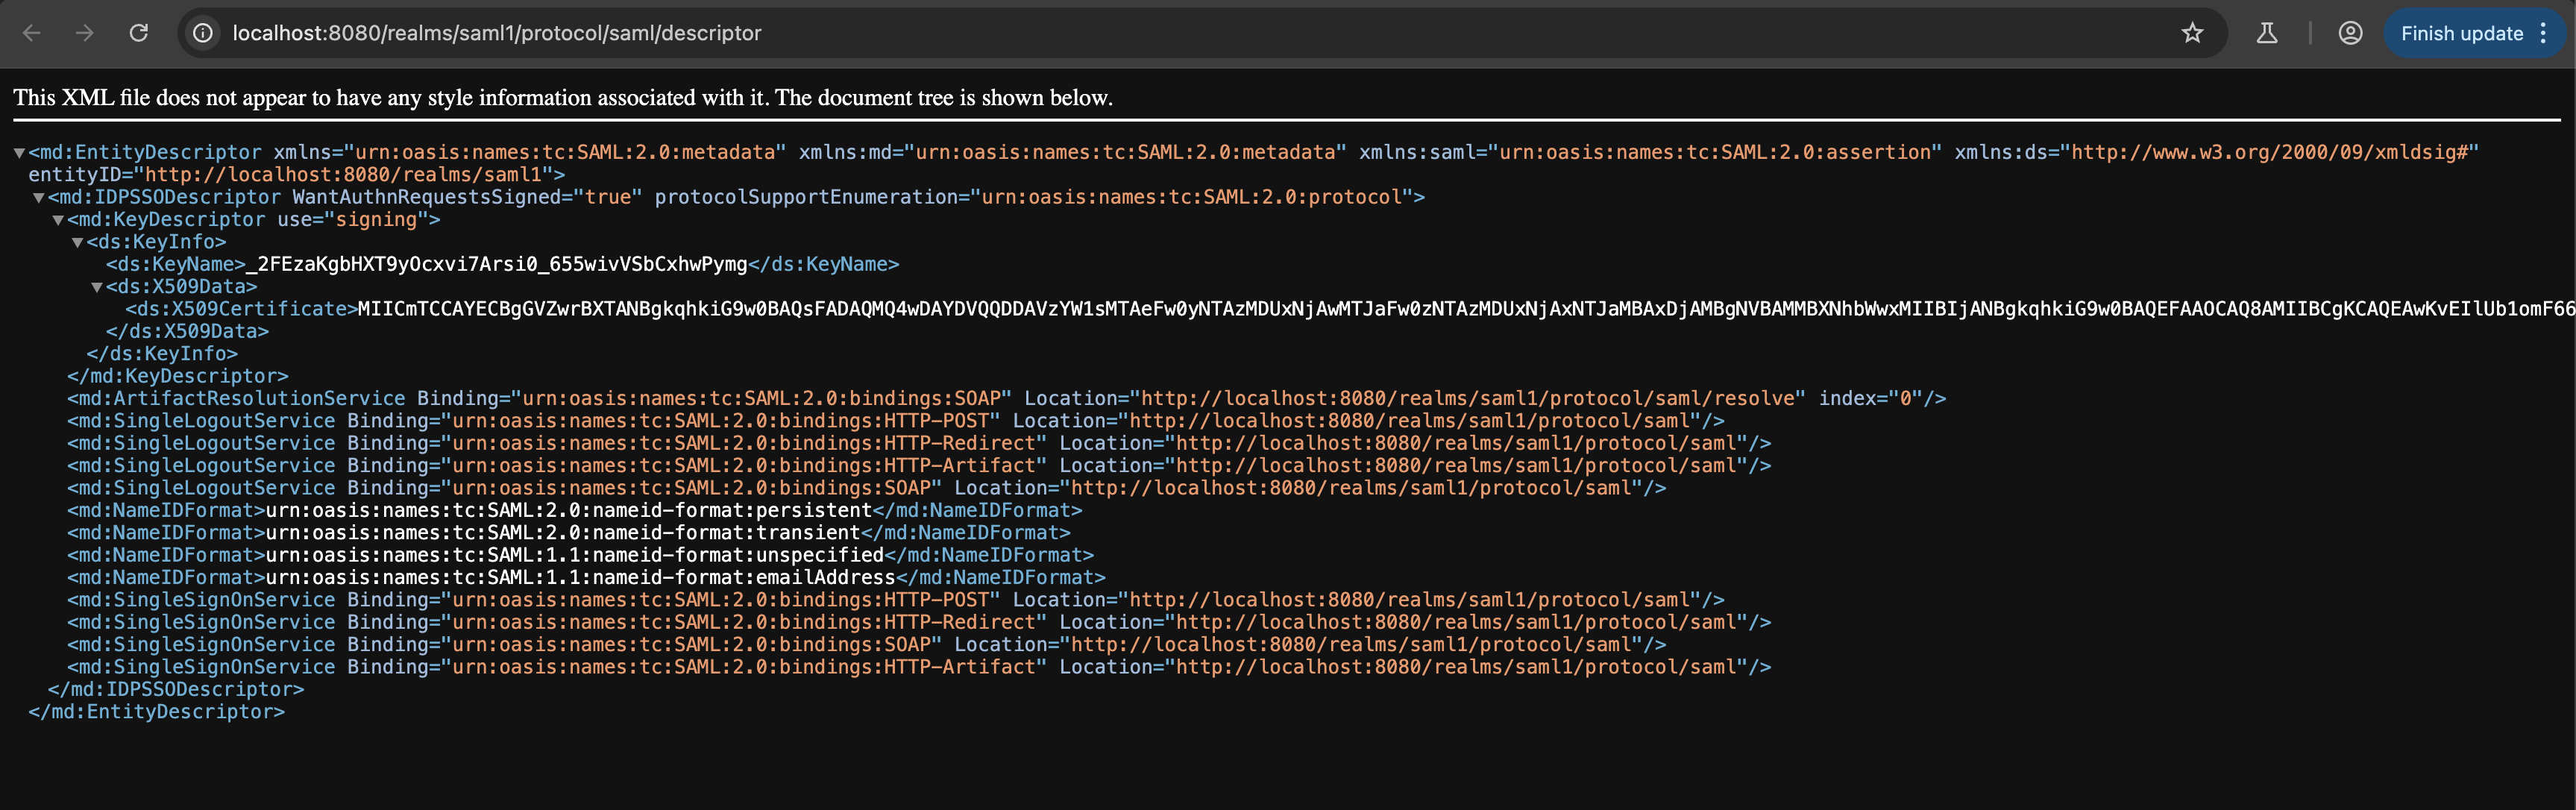
-
Run the following command:
curl -s http://localhost:8080/realms/saml1/protocol/saml/descriptor > TEMP_FOLDER/keyclock-idp-metadata.xml -
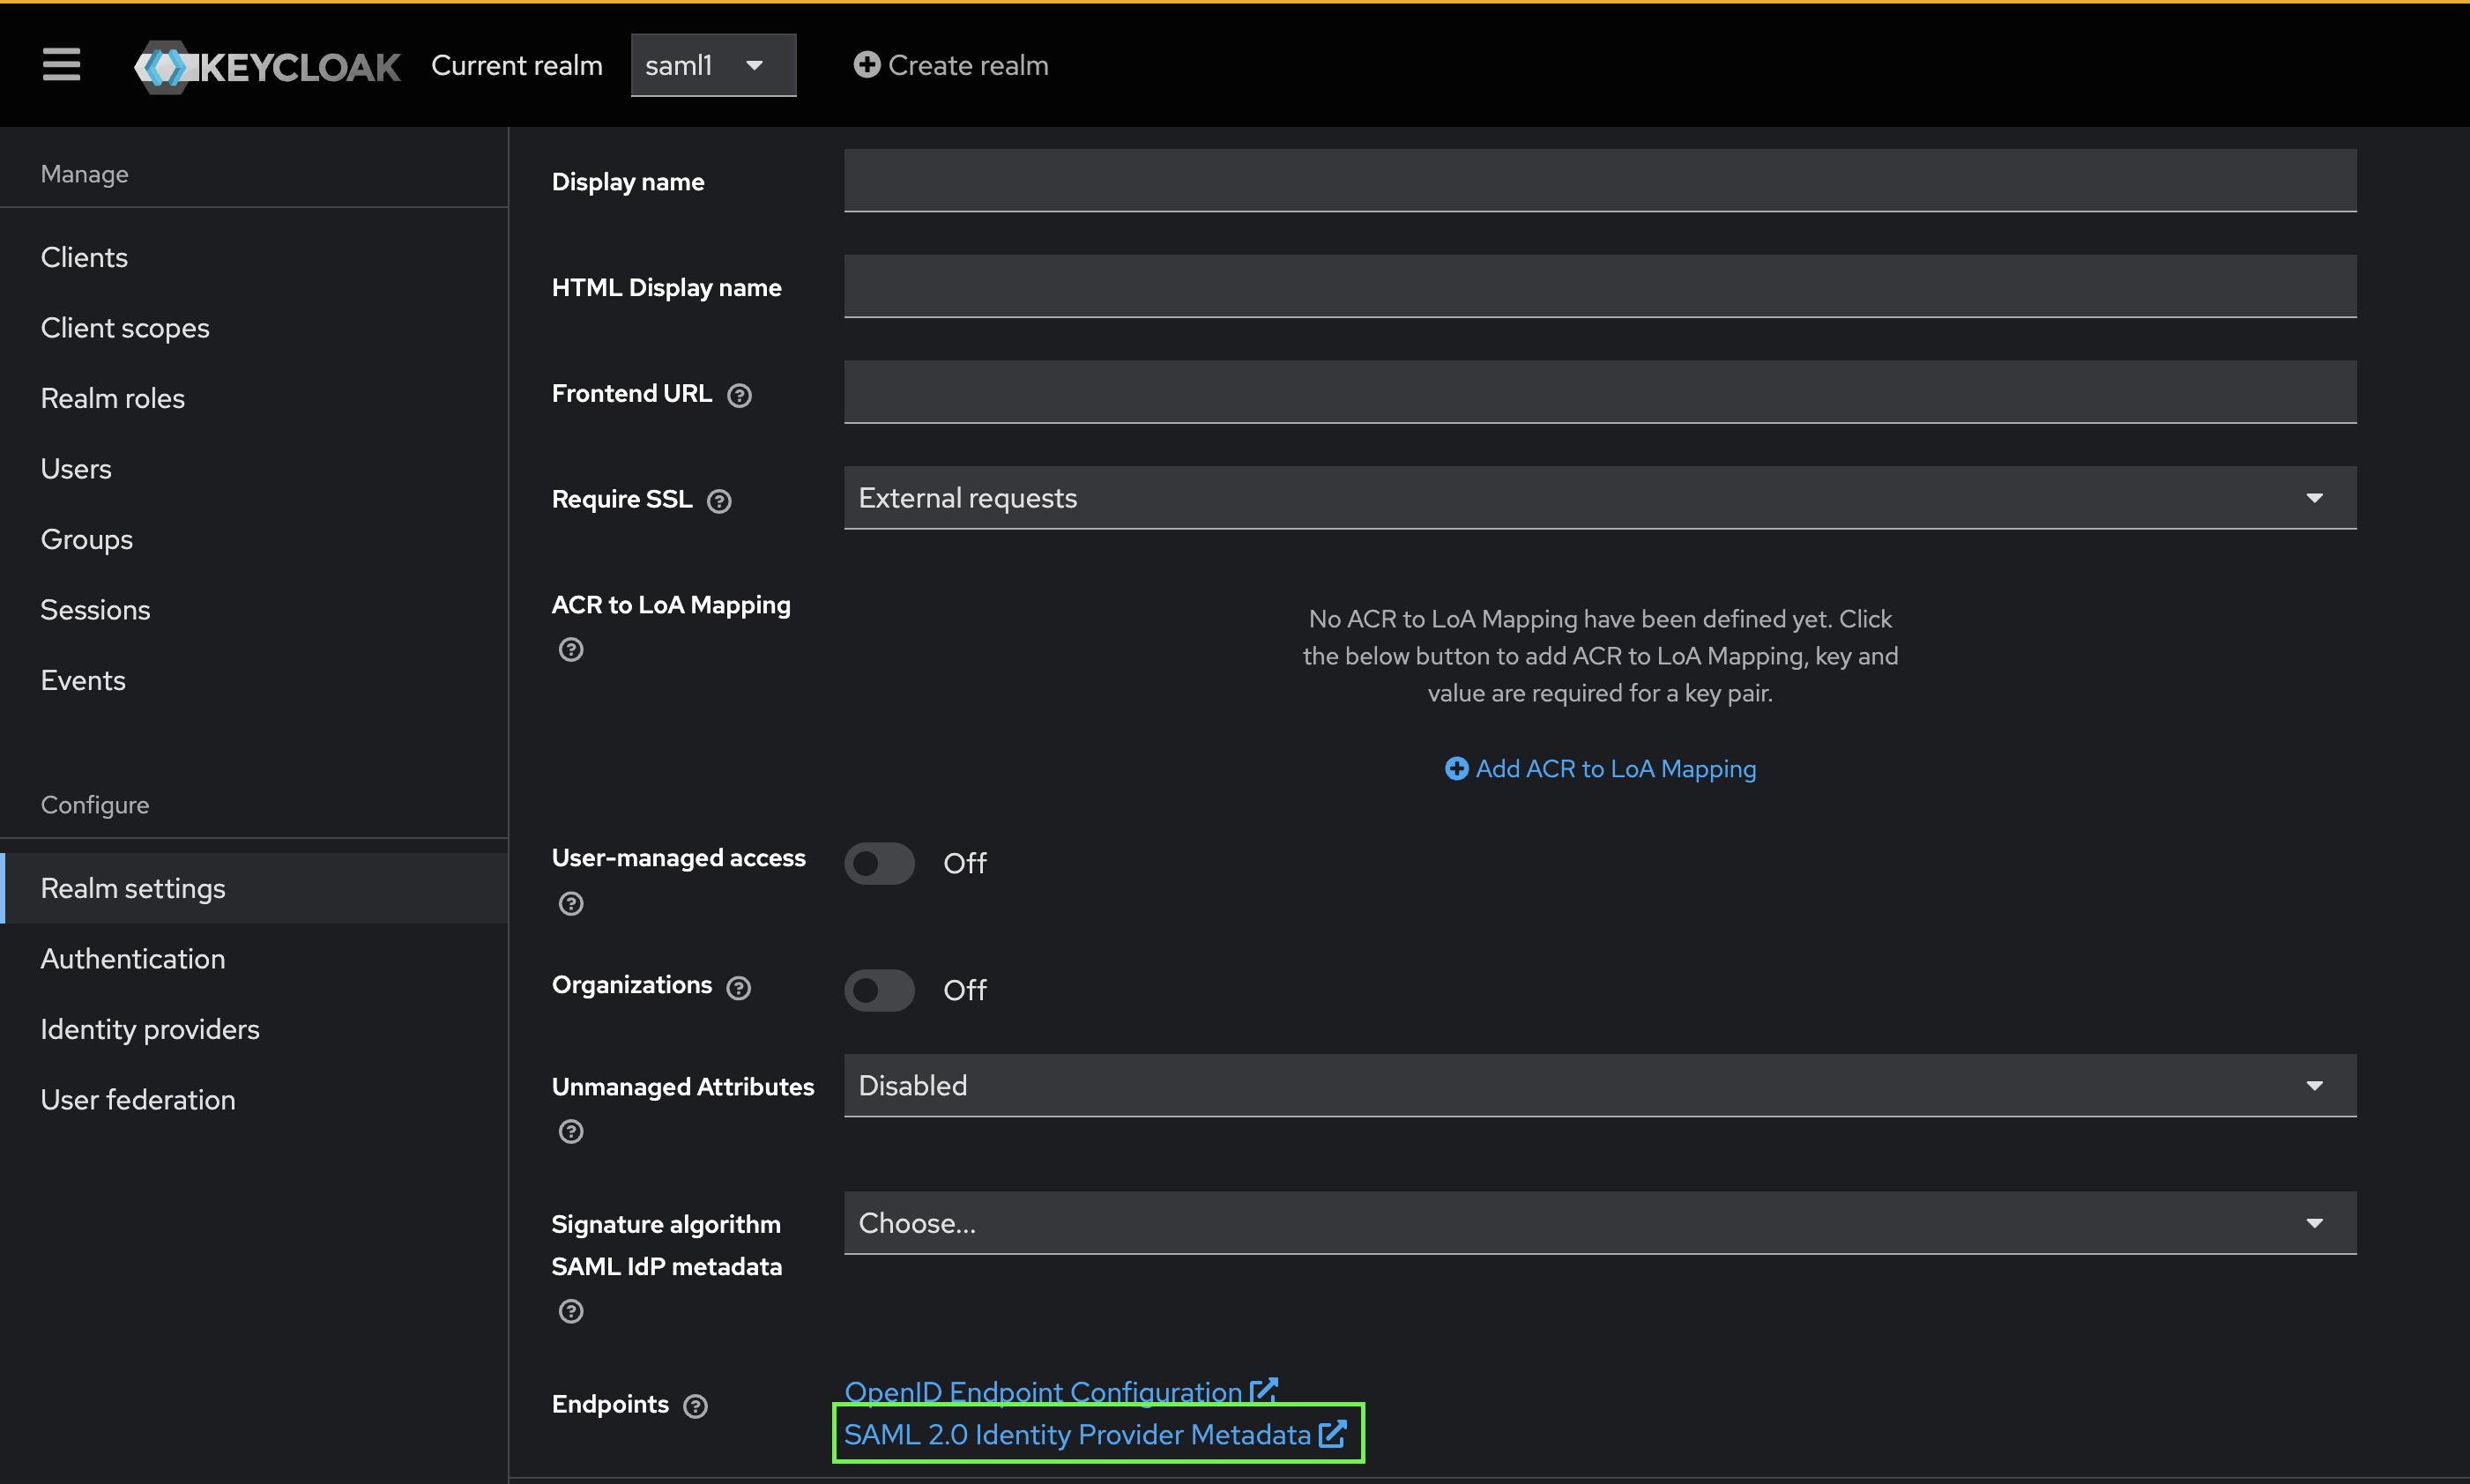
To see the content, click the following link at saml1 realm page:
Configuring idp (keycloak) initiated login
-
To configure keycloak initiated login (idp initiated login), add following setting to saml-siren client configuration:
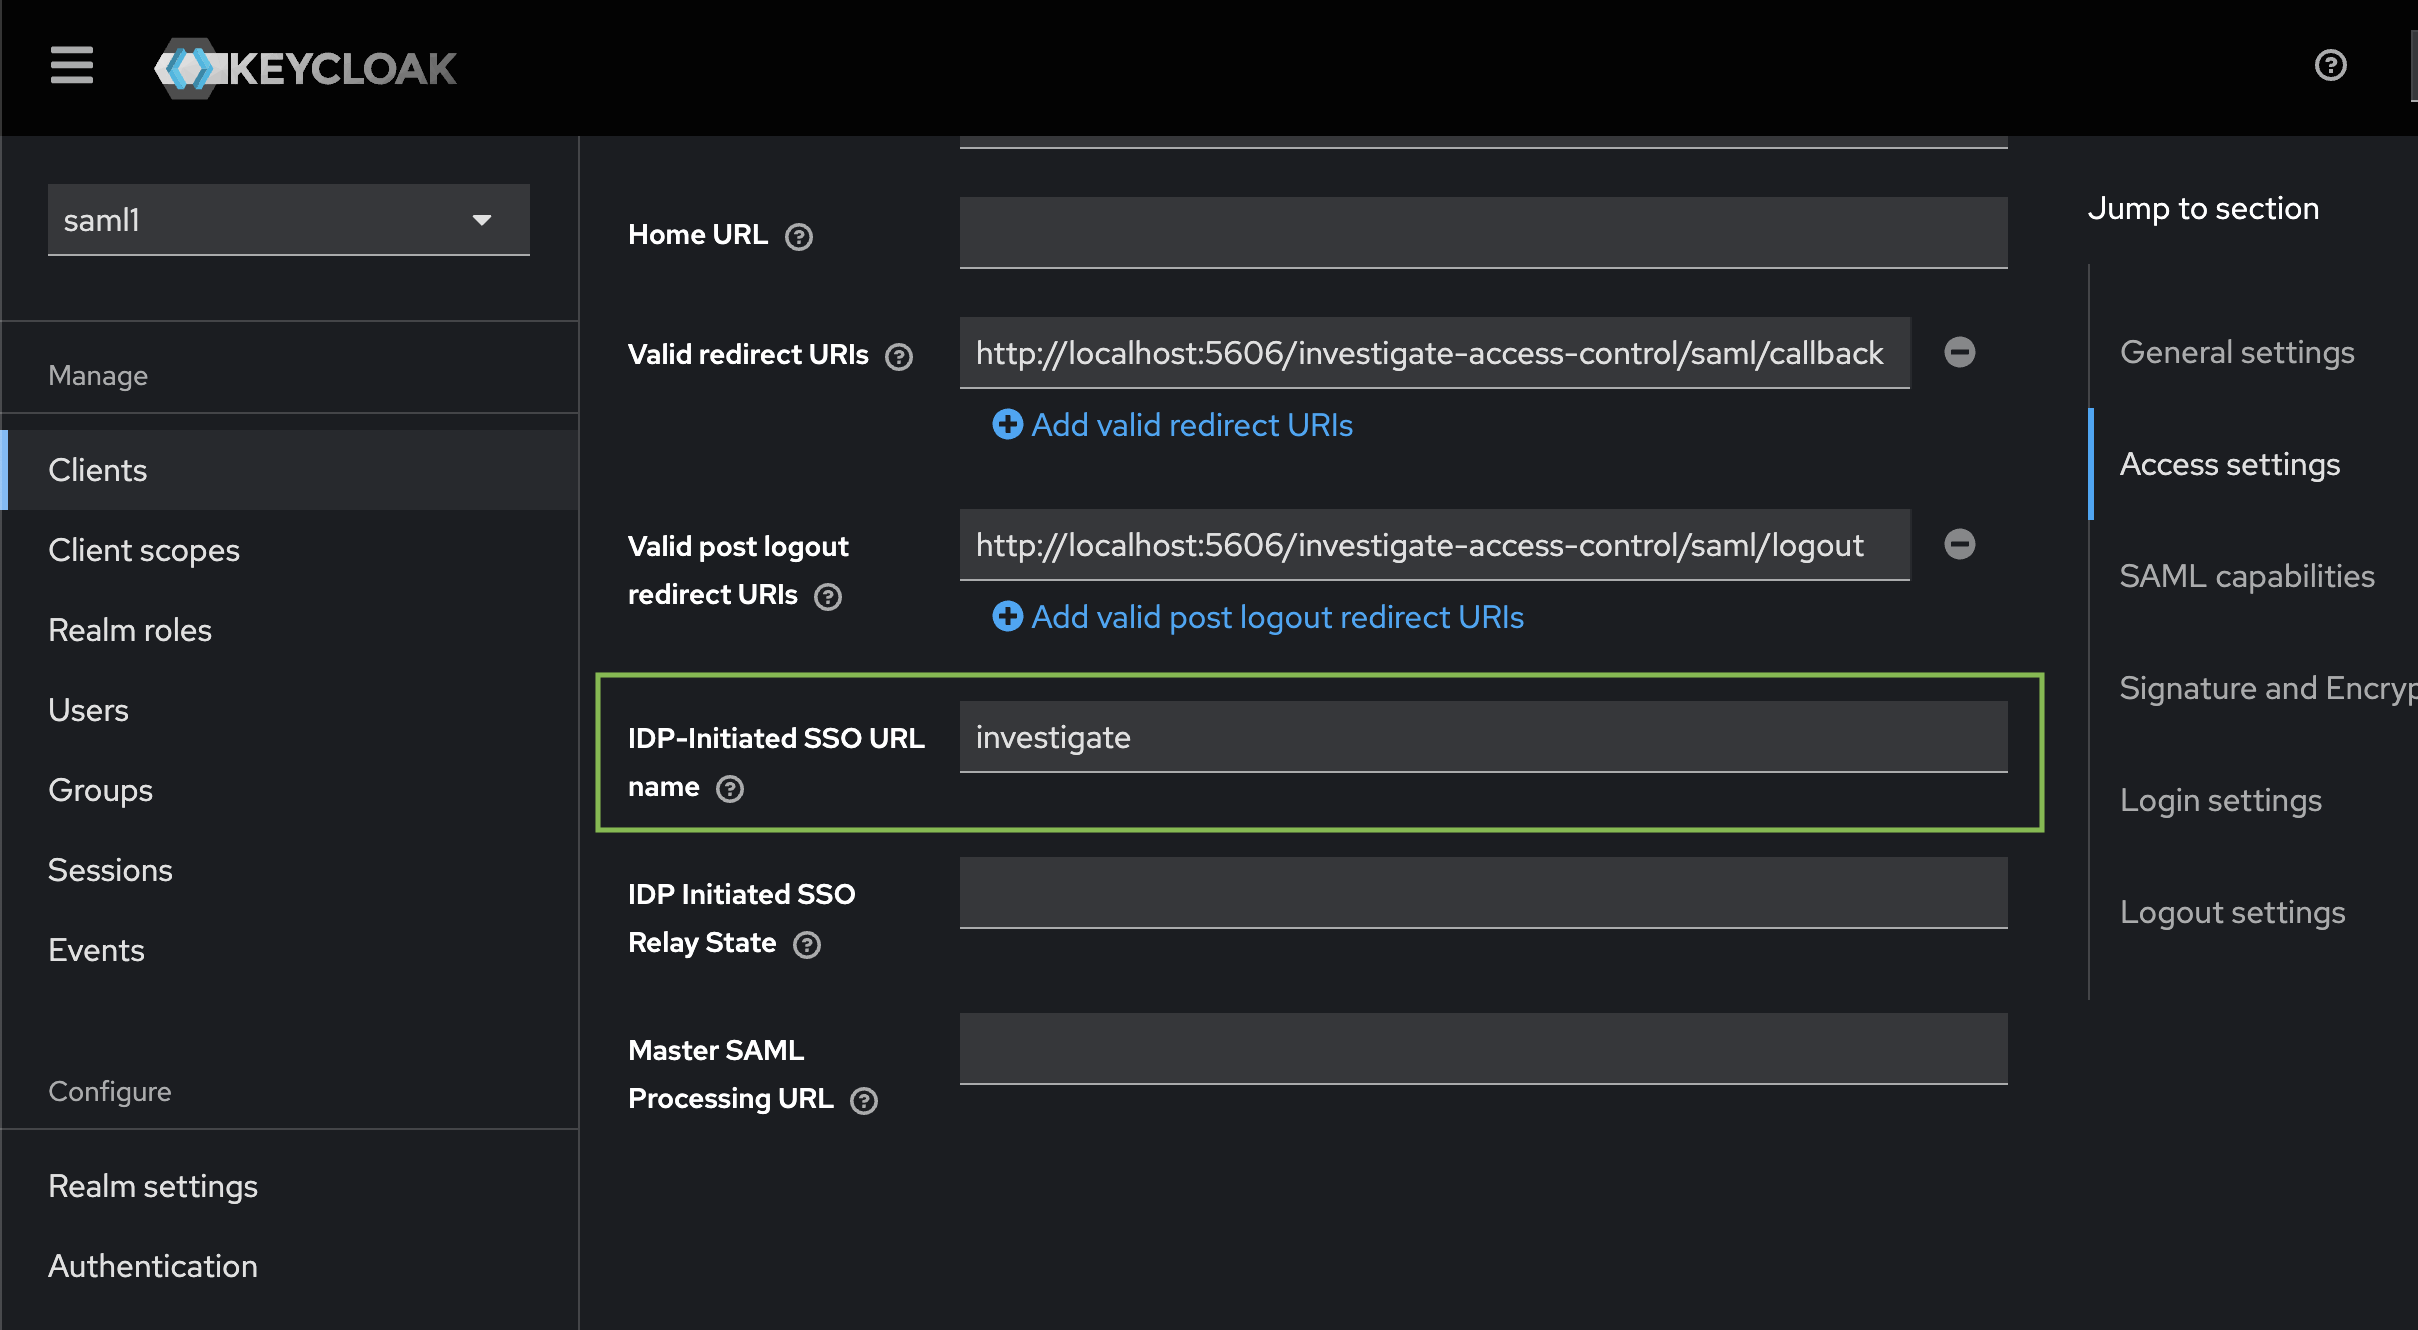
This configures a special URL that can be accessed to login:
http://localhost:8080/realms/saml1/protocol/saml/clients/investigate -
Add the following properties in siren-saml client advance settings:
-
Now to login this way in the browser.
http://localhost:8080/realms/saml1/protocol/saml/clients/investigate
You should see the keycloak login form. After filling in credentials, you are redirected to Investigate.
Configuring Elasticsearch
-
Execute the following command:
mkdir ELASTICSEARCH_BASE_DIR/config/saml cp TEMP_FOLDER/keyclock-idp-metadata.xml TEMP_FOLDER/saml-sign.crt TEMP_FOLDER/saml-sign.key ELASTICSEARCH_BASE_DIR/config/saml/ cd ELASTICSEARCH_BASE_DIR bin/elasticsearch-plugin install -b https://download.support.siren.io/federate/8.15.5-37.2.zip -
Edit
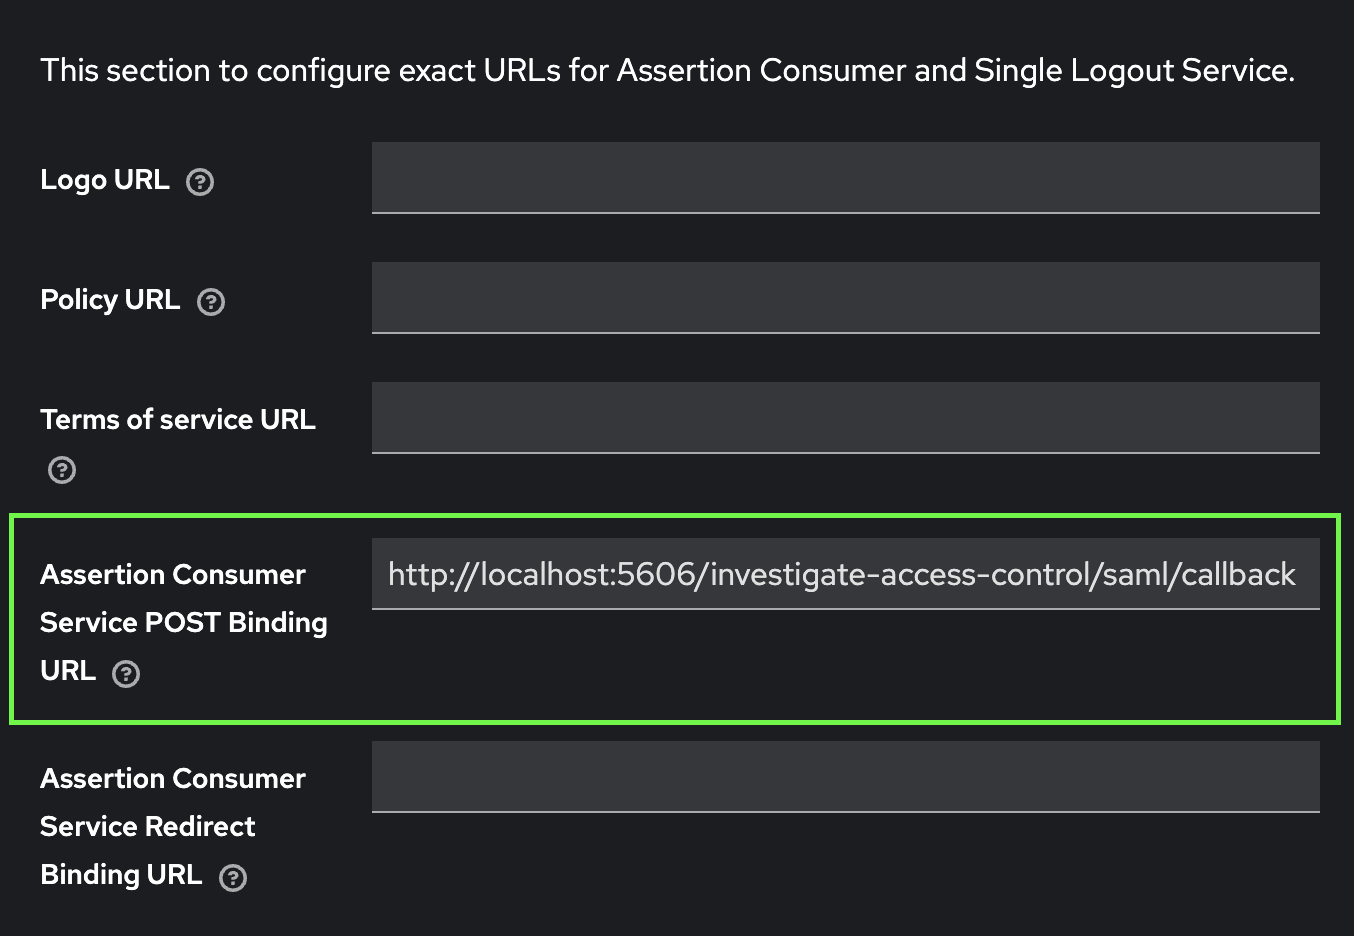
elasticsearch.ymlas follows:cluster.name: siren-distribution node.name: siren-node ingest.geoip.downloader.enabled: false xpack.ml.enabled: false discovery.type: single-node indices.query.bool.max_clause_count: 15000 indices.breaker.total.use_real_memory: false cluster.routing.allocation.disk.watermark.low: 3gb cluster.routing.allocation.disk.watermark.high: 2gb cluster.routing.allocation.disk.watermark.flood_stage: 1gb siren.dataspaces.jws.pubkey: 'MIIBIjANBgkqhkiG9w0BAQEFAAOCAQ8AMIIBCgKCAQEA3CVFpHclqIEEERUhC/oDB+8ib+nDGIcmrIppGmmsmj5K65XCCZmHilR2fx9CNbjR5WLQDeOT0zhK0FHip41qNbOGwLbz1ehpquEwR/+W6bKyWkk0wMoS1npVSIZL0QygjatIszjKIgOti2FEzPxFxmHoroVluRTm84oIuY+KX/ExxLbS69ORJ8MUFu5oc/B1lNSmWwCCQlJmjjKR4RJt81otQkRQ+tMQS6Aek/bQWz23HhMBypwdXbXlZsLOO4ZKTWQrIZ1F32c+/6+mnvW2UKCISSLucKWBj3/sIMoKXKfFjsfyb41O9DXO3BZcQkWvw98mRhiZ/VzPUz6nwJd3UwIDAQAB' xpack.security: enabled: true authc: token.enabled: true realms: native: native1: order: 0 saml: saml1: order: 2 attributes: principal: "username" groups: "groups" idp: metadata.path: "<ELASTICSEARCH_BASE_DIR>/config/saml/keyclock-idp-metadata.xml" entity_id: "http://localhost:8080/realms/saml1" sp: entity_id: "siren-saml" acs: "http://localhost:5606/investigate-access-control/saml/callback" logout: "http://localhost:5606/investigate-access-control/logout" signing: certificate: "<ELASTICSEARCH_BASE_DIR>/config/saml/saml-sign.crt" key: "<ELASTICSEARCH_BASE_DIR>/config/saml/saml-sign.key" -
Start elasticsearch and configure basic users:
./bin/elasticsearch bin/elasticsearch-setup-passwords interactive -
Answer
passwordfor all users. -
Activate the trial license. Without it saml realm configuration will NOT work.
curl -uelastic:password -XPOST "http://localhost:9200/_license/start_trial?acknowledge=true" {"acknowledged":true,"trial_was_started":true,"type":"trial"} -
Stop and start Elasticsearch.
CTRL+C ./bin/elasticsearch -
Install Investigate users and roles.
chmod 755 INVESTIGATE_BASE_DIR/docs/modules/siren-investigate/attachments/xpack/full/initroles.sh chmod 755 INVESTIGATE_BASE_DIR/docs/modules/siren-investigate/attachments/xpack/initusers.sh INVESTIGATE_BASE_DIR/docs/modules/siren-investigate/attachments/xpack/full/initroles.sh # here answer only to second question INVESTIGATE_BASE_DIR/docs/modules/siren-investigate/attachments/xpack/initusers.sh # here answer only to second question -
Install the Investigate license:
curl -XPUT -uelastic:password -H 'Content-Type: application/json' -T investigate-license http://localhost:9200/_siren/license -
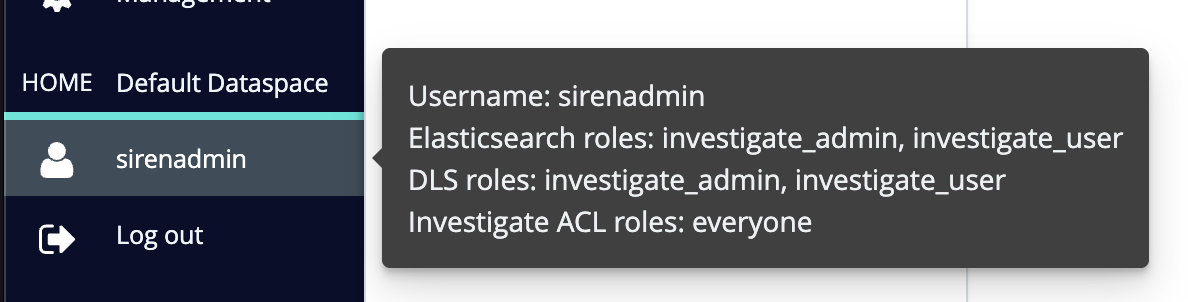
Add the role mappings to map keycloak groups to Elasticsearch roles.
curl -k -XPUT -uelastic:password http://localhost:9200/_security/role_mapping/investigate_admin -H "Content-Type: application/json" -d '{
  "roles": [ "investigate_admin" ],
  "enabled": true,
  "rules": { "all": [
        { "field": { "realm.name": "saml1" } },
        { "field": { "groups": "keycloak_admin_group"} }
  ] }
}'

curl -k -XPUT -uelastic:password http://localhost:9200/_security/role_mapping/investigate_user -H "Content-Type: application/json" -d '{
  "roles": [ "investigate_user" ],
  "enabled": true,
  "rules": { "all": [
        { "field": { "realm.name": "saml1" } },
        { "field": { "groups": "keycloak_user_group"} }
  ] }
}'
Configuring Investigate
-
Edit
INVESTIGATE_BASE_DIR/config/investigate.yml.elasticsearch.url: "http://localhost:9200" elasticsearch.username: "sirenserver" elasticsearch.password: "password" server.ssl.enabled: false elasticsearch.ssl.verificationMode: none server.host: "0.0.0.0" logging.promoteDebug: tags: [] #'samlAuth', 'samlLogin', 'samlLogout' toLevel: 'info' investigate_access_control: enabled: true acl: enabled: true admin_role: investigate_admin session: backend: false cookie: name: 'kac' password: '12345678123456781234567812345678' secure: false backend: xpack backends: xpack: authenticator: saml saml: realm: saml1 -
Start Investigate.
cd INVESTIGATE_BASE_DIR
./bin/investigate